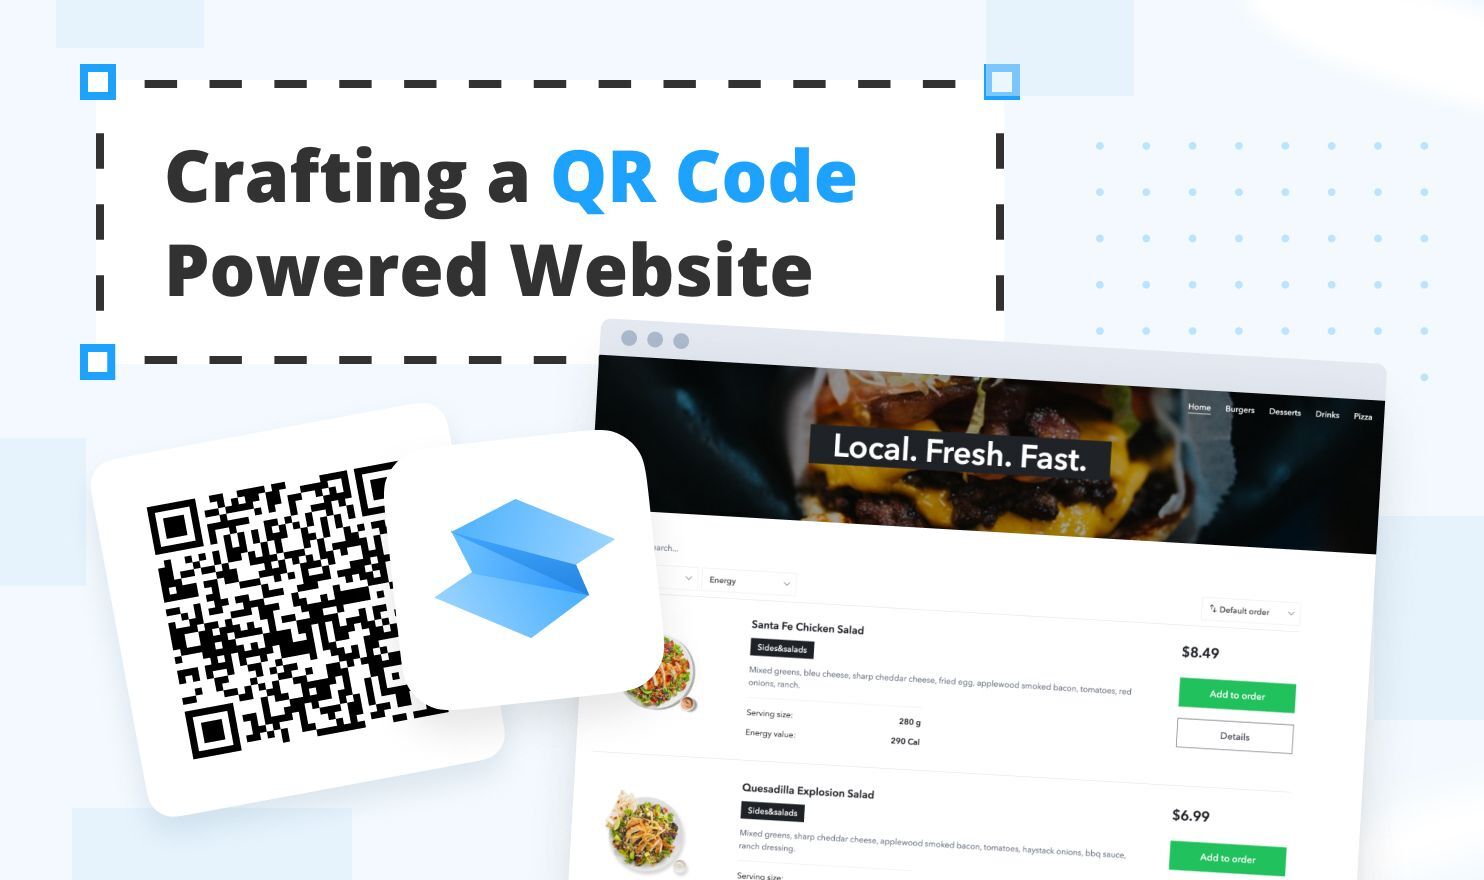
Crafting a QR Code-Powered Website for Restaurant Menus and Ordering Using SpreadSimple
TL;DR: Build a restaurant’s online menu from Google Sheets with SpreadSimple, publish it behind table-specific QR codes, add table-number capture to the order form, and route orders by email or WhatsApp. Keep the online menu synchronized with physical availability so the faster ordering flow remains accurate.
In today's digital world, every business needs to change and adapt to the times, especially restaurants, owing to the post-COVID era. QR code ordering systems are the future of technology and have become an essential tool for many eateries. They offer a contactless, seamless, and eco-friendly way to present your menus to customers. Not only are they safe and hygienic, but they also enable a quick table service along with an efficient ordering process for your customers.
QR code menus are digital versions of the physical booklets you would typically get at a restaurant, café, or bar. They have become a symbol of the new era of dining out. If you want your restaurant business to adapt to the changing times, our comprehensive guide will walk you through the process of crafting a QR code menu, setting up an online ordering system, and integrating an automated table number filling with SpreadSimple in just 4 steps.
Step 1: Create an online food menu for your restaurant
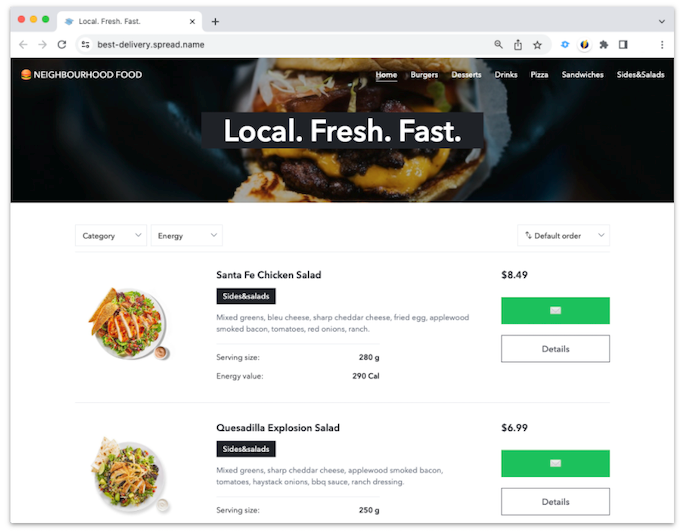
SpreadSimple is a powerful no-code website builder tool that lets you create an online ordering system for your restaurant website using just a Google Sheets document. In the first step, we will create an online menu using Google Sheets and then publish it, by following the step-by-step guide below:
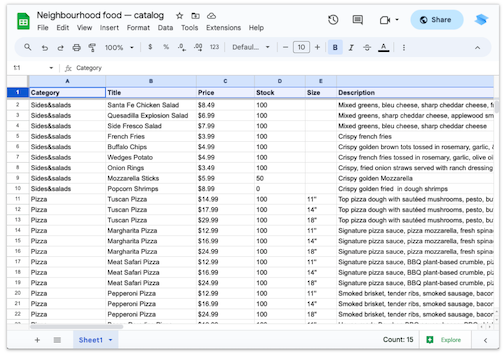
1. Create your food menu in a Google spreadsheet
Open Google Sheets and select a new blank document.
In the columns, add headers that would correspond to the different components of your menu, such as "Item Name", "Description", "Price", “Weight”, "Category", and "Image URL".
Fill the corresponding rows with the details of each food item. But make sure that each row represents only a single dish on the menu. To include a food picture, you will need to upload the images to a hosting website and paste the URL in the last "Image URL" column.
2. Create an online menu from your spreadsheet
- Go to https://spreadsimple.com/ and sign up for an account by clicking on the right-top corner button labeled Get Started, if you do not have an account already.
- Once you have logged in, click on the Create a New Website button.
- Click on the Google Spreadsheet link button and paste your Google Sheet link into the corresponding field.
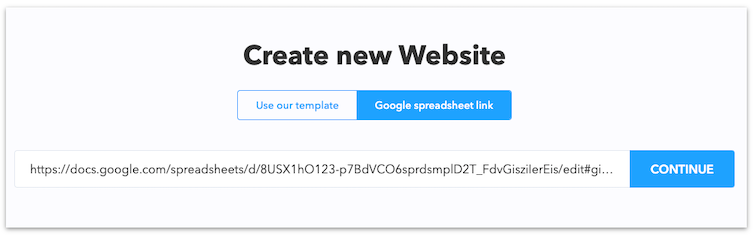
In a few seconds, a website will be generated for you.
3. Customize your online menu
Now that you have сreate an online menu, it is time to personalize it. Using the design options provided by SpreadSimple, you can adjust the appearance of your website.
You can also add various features like filters, search, create categories, change the menu layout, and more.
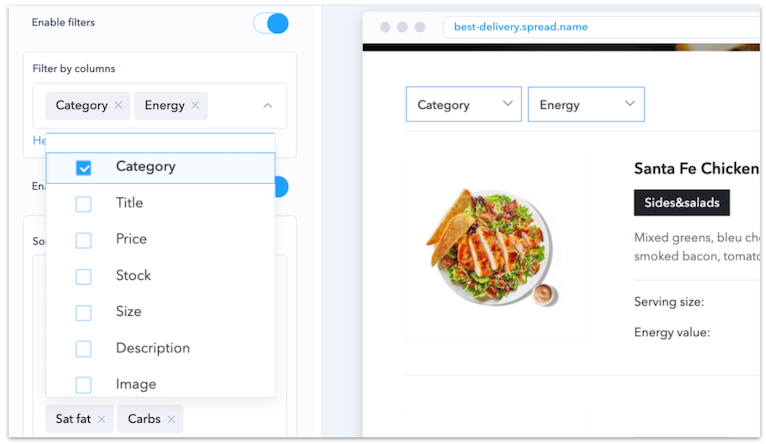
To provide customers with a convenient way to purchase the items/dishes online, you can also set up order form, add shipping options, connect payment gateways and provide several ways to pay for the order.
4. Publish your menu
After you have finished with the changes, thoroughly examine your menu. And if you are satisfied with its look, layout, and functionality, change your website domain by customizing the default subdomain or connecting your custom domain.
Then click the Publish button to make your online menu go live.
Congratulations! You have successfully created an online menu for your business with the help of Google Sheets and SpreadSimple. Just remember to update your Google Sheet document whenever you make any changes to your physical menu. Since SpreadSimple uses your spreadsheet as its CMS, the changes will be automatically updated in real-time.
This menu is now ready to be linked to your QR code for easy access by your consumers.
Step 2: Implement automated table number filling
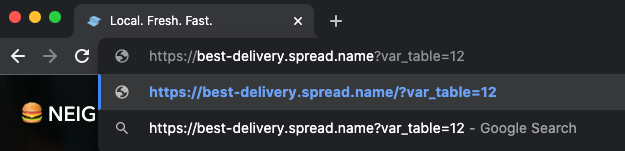
Now that we have created your online menu, let us enable automated table number filling. To do this, we need to generate a unique QR code and URL for each table, with a specific differentiating parameter like the table numbers.
- You will use the URL Replacement Tags Add-on in SpreadSimple.
- Using the parameter
var_table={TABLE NUMBER}you will assign the table numbers. For example,var_table=12. - This is how your full URL should look
https://best-delivery.spread.name/?var_table=12:
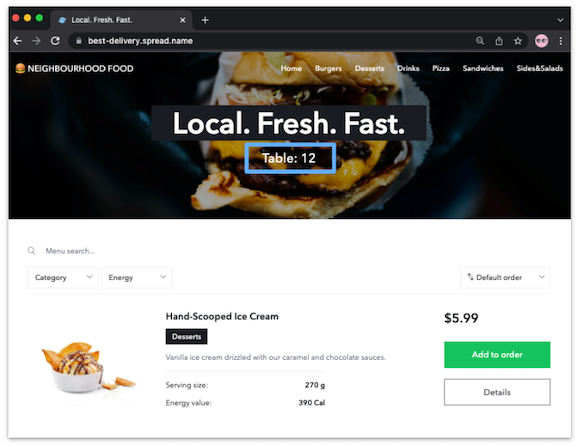
- Next, you will go to the menu page and add a page subtitle where the table number should be displayed.

- This can be done in the Design Tab -> Home Page Intro menu.
- Just set the table number in the Page subtitle as Table:
. - When the customers follow the link with the parameter, their table number will automatically be displayed on the web page and should look like this:
- Make sure you create an individual link and QR code for every table in your establishment. For instance, if you have a total of 15 tables, then you shall create 15 URL links, one for each table.
Step 3: Add a new field to the order form and choose the way to receive orders
There are several ways offered by SpreadSimple to receive your orders after a customer fills in the order form – by email, WhatsApp, or even collect them in another Google Sheet.
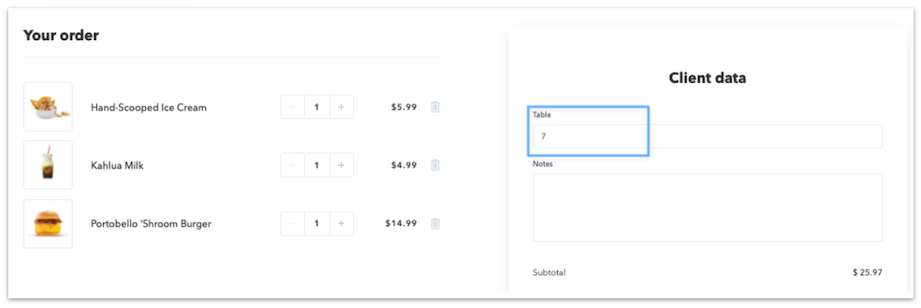
No matter which way to collect orders you choose, first of all, you need to include a new field in your order form.
To do that, go to the Checkout Settings -> Form fields menu and create a new form field. You can name this field Default Value.

This is how the new field will look in the order form.
For more detailed information on how to add the table parameters, please refer to our help center guide.
Email notification
If your business is using emails to receive orders, then you need to add the parameter Table#: in the email template as shown in the image below.
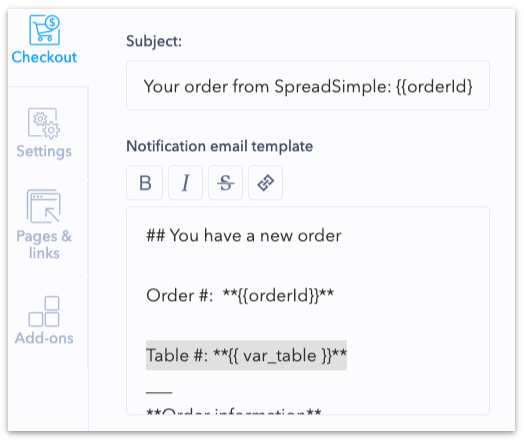
This way, when a customer places an order by accessing the URL link after scanning the specific QR code, their order would automatically include the table number along with the other relevant details in an email notification.
WhatsApp message
For orders collected in WhatsApp, the same parameter Table#: needs to be included in the message template as displayed below.
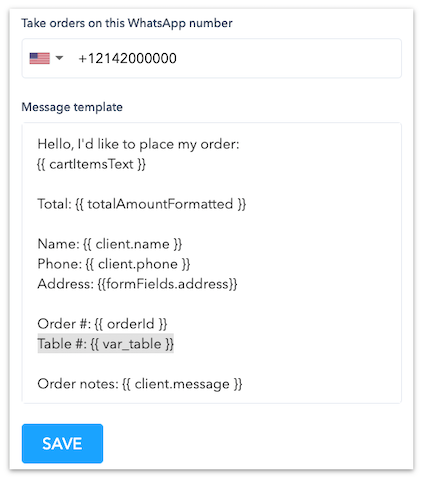
In doing so, you make sure that all orders received via WhatsApp messages shall include the individual table numbers along with the order details.
Step 4: Create your QR code and link it to your online menu
There are many QR code generators in the market today such as QR code generator, QR code Monkey, Canva, and Adobe Express. You can go through their T&C and choose the one that suits your business needs the best. The final step in developing your automated online ordering system requires you to create your QR code and link it to your online menu. You can do so with the help of the following steps:
1. Generate your QR Code
- Sign up and create an account on the QR code generator website of your choice.
- Copy and paste the URL of your online menu into the QR code generator.
- Choose the type of QR code you want the website to generate. In our case, it is the “Website URL” QR code.
- Click on "Create QR Code" or "Generate QR Code" and your unique QR code shall be created.
2. Customize your QR Code
Some of the QR code generators allow for customization as well. This enables your business to change the color, add your company logo, insert your brand image, and modify the shape of the QR code elements to match your restaurant’s branding. This is an optional step, but we recommend you personalize the QR code as it helps with building customer loyalty and brand recognition in the long run.
3. Download and test your QR Code
- Once you are satisfied with your personalized QR code, you should download it. Most QR code generators offer several format options like PNG, JPG, SVG, or EPS. The most commonly used among these is the PNG or JPG.
- Using a QR code reader or your smartphone's camera, test your QR code and make sure that it redirects to your online menu correctly and also functions smoothly.
4. Print and display your QR Code
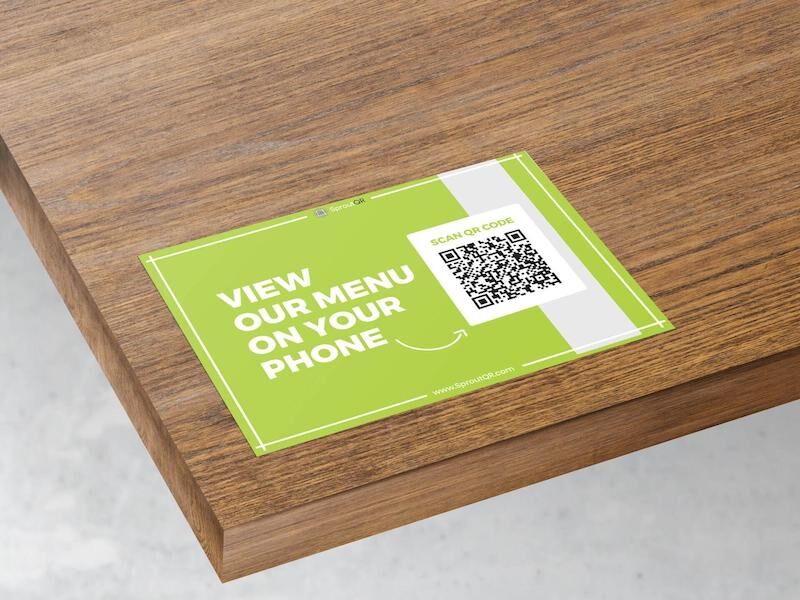
Now that you have your QR code, you should print and display it prominently all around your restaurant. Make sure to place it on the tabletops, near the billing counters, bar area, and even on the front door and windows of the premises. The QR codes can be printed on paper, engraved on materials like wood, plastic, or metal, affixed to tables, or included in promotional brochures as shown below in the reference images.
Conclusion
Implementing a QR code-generated menu along with an integrated online ordering system and automated table number filling will revolutionize the way your food business operates. It enhances your customer experiences, improves operational efficiency, and helps your company keep pace with the rapidly evolving digital landscape, especially in the food service industry.
Just remember that you need to update your online menu as and when there are any changes made to your physical menu so that it can be automatically reflected. In case you change the URL of your online menu, follow the process again and generate a new QR code and link it to your new URL.

