Step-By-Step Guide to Automating Adding Google Maps Markers on Your Website
TL;DR: Automate new website map markers by connecting a Telegram bot, Google Sheets, SpreadSimple, Google Maps, and Make.com. The workflow captures submitted location data, adds a row to the site’s source Sheet, updates the displayed map, and sends a confirmation response through Telegram.
Map markers are an effective communication tool: with them, it’s much easier to show your clients the exact locations of your offline spots — stores, offices, restaurants, etc. However, for small business owners who are not familiar with coding, it might be difficult to add a map with markers to their websites and keep them updated.
The good news is that adding and removing map markers can easily be automated with a simple Telegram bot and SpreadSimple — and you don’t need any special knowledge. In this guide, we'll walk you through each step, from creating the bot to fully automating map integration on your website.
As a final result, you’ll have a streamlined system that allows you to simply send a link to the Telegram bot to have your markers placed and categorized in your Google Spreadsheet connected to your website.
Stay tuned to automate map markers on your website once and for all!
The tech stack used in this tutorial
Telegram Bot
- Assists with real-time data management.
- Transfers URLs into our automation.
Create your own Telegram bot using the instructions provided below.
Google Sheets
- We will use your Google Sheet, which is linked to your SpreadSimple website and works as your website’s content management system.
SpreadSimple
- Our no-code website builder allows you to create a website from any Google Sheet without much effort.
Make.com
- A no-code service for configuring integrations between various apps and data transfer between them. We will use it to set up our automation.
With that stack, you will be able to build an automation that works like this:
Step 1: Set Up SpreadSimple Website and Prepare a Google Sheet
1. Set up SpreadSimple, If you haven't done so already, sign up to SpreadSimple and create a website using one of the templates. Follow the step-by-step guide on how to create a website with SpreadSimple.
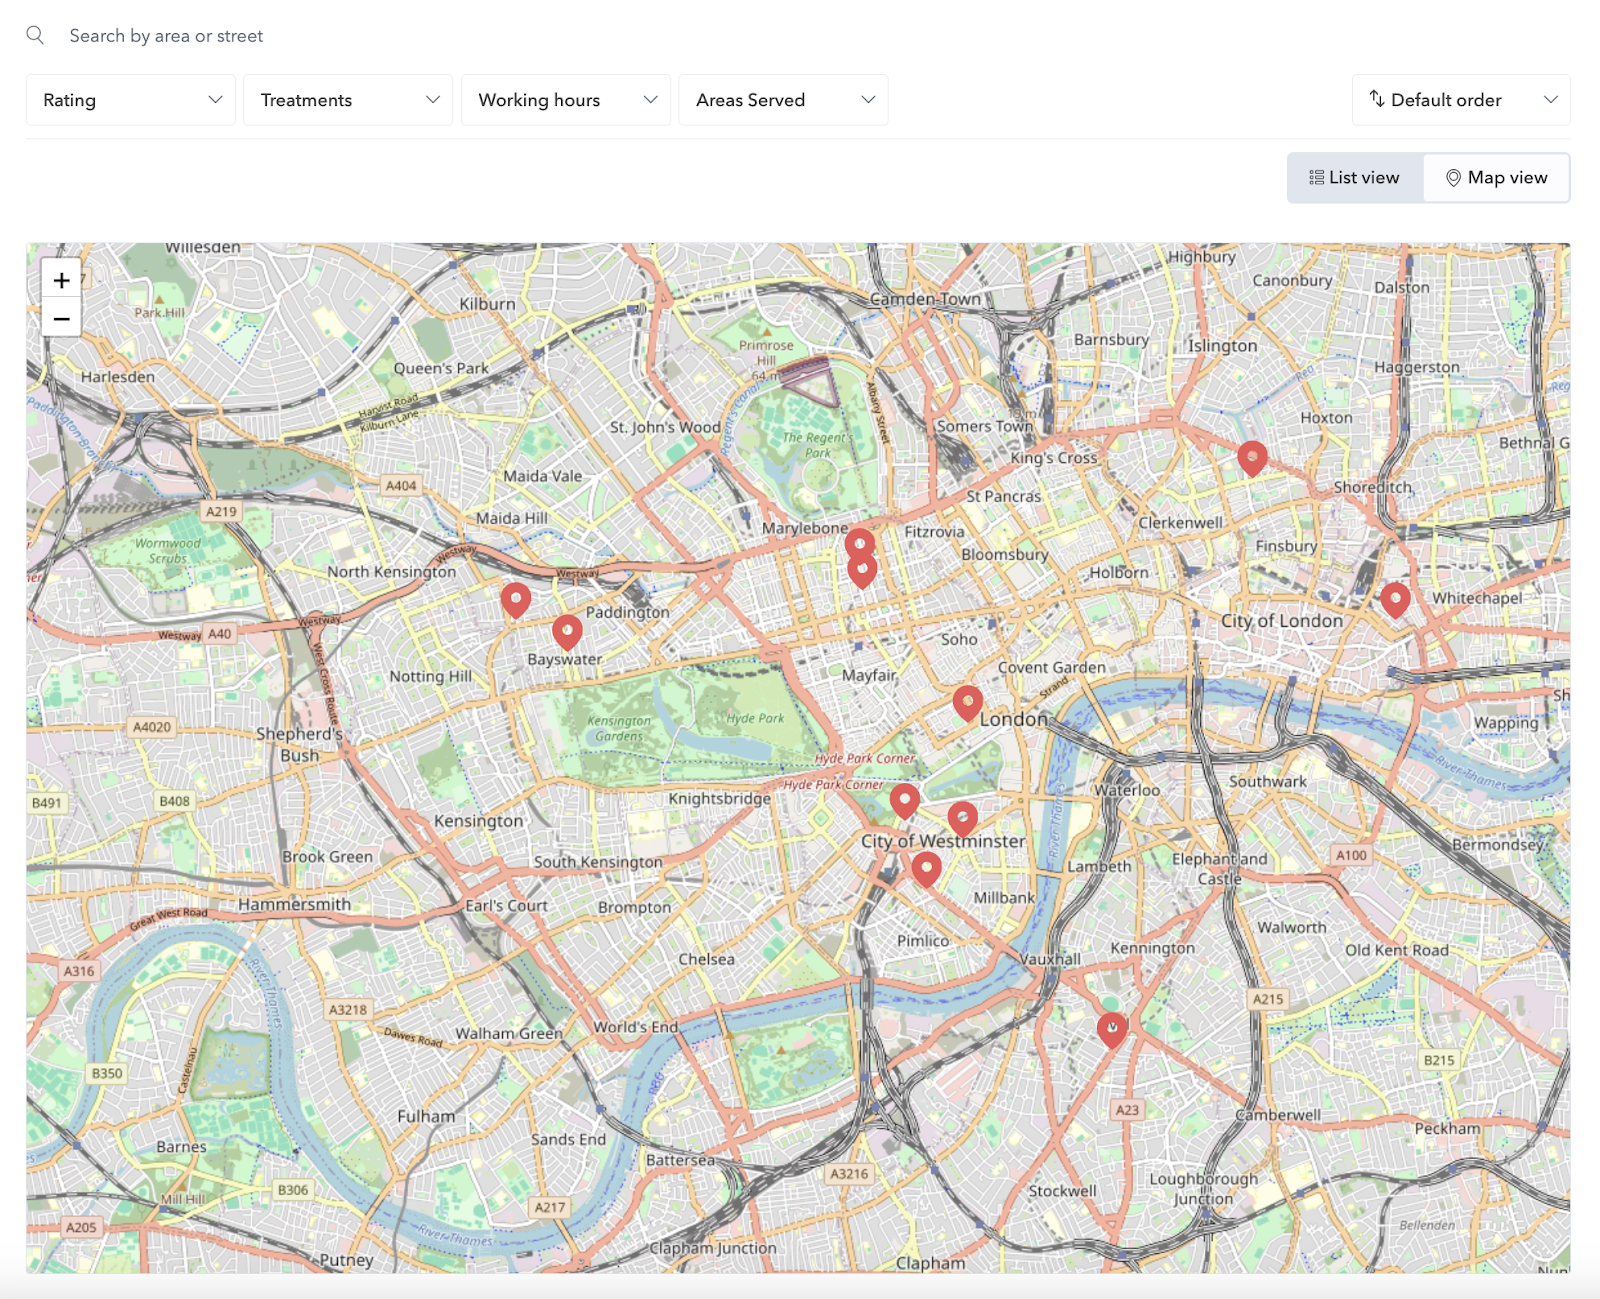
2. Create a map on your website. Add a map view to your website using the advanced mapping features to visualize and present data.
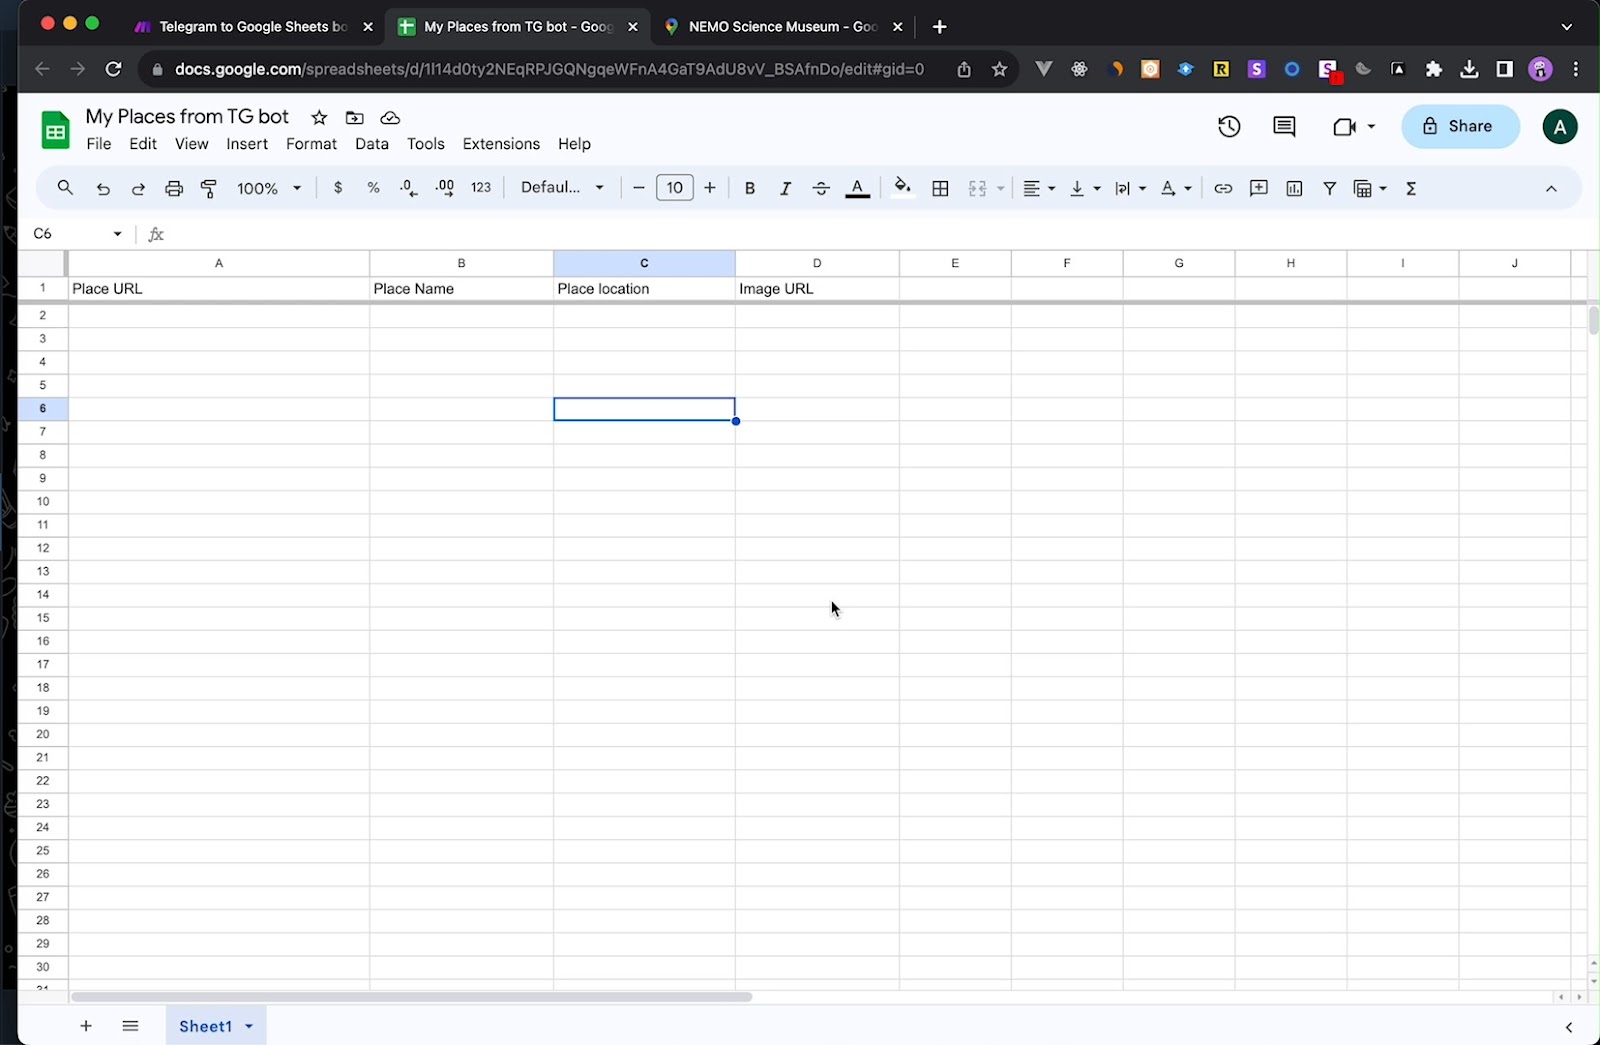
3. Open Google Sheets, connected to your website with SpreadSimple. This file will store the information extracted by the Telegram bot.
4. Create the Telegram bot in the Telegram app with the help of BotFather. If you’ve never created a bot before, follow the steps of the tutorial on Make.com.
When creating the bot, the BotFather will send you a token — a code allowing you to access the bot settings. Save the token, you will need it to create the integration with Google Sheets.
Step 2: Create an Integration in Make.com

1. Log into Make.com — you need this service to create the integration. If you don’t have an account yet, sign in. After setting up your account, proceed to create your integration. We have already explained how to extract titles and descriptions from links and import them to Google Sheets with a Telegram bot. Read on to learn how to apply the same framework to adding Google Maps markers.
2. Create the Integration or import a ready-to-use blueprint.
Instead of creating the automation from scratch, you can use a template that we’ve prepared for you. Download the file below and import it into Make.com. After that, you will have to only specify your Telegram credentials and link your Google Sheet.
If you want to create the scenario on your own, click the “Create new scenario” button to start setting up the connection. As a first service for integration, select the Telegram bot. Then click “Watch Updates” to set up the trigger.
Follow the instructions to establish the connection. At this point, you will be asked to provide the token for your bot.
3. Add the Router: go to Tools and select Router. The router is essential for segmenting actions within the automation.
Step 3: Add Google Maps to Your Make.com Scenario
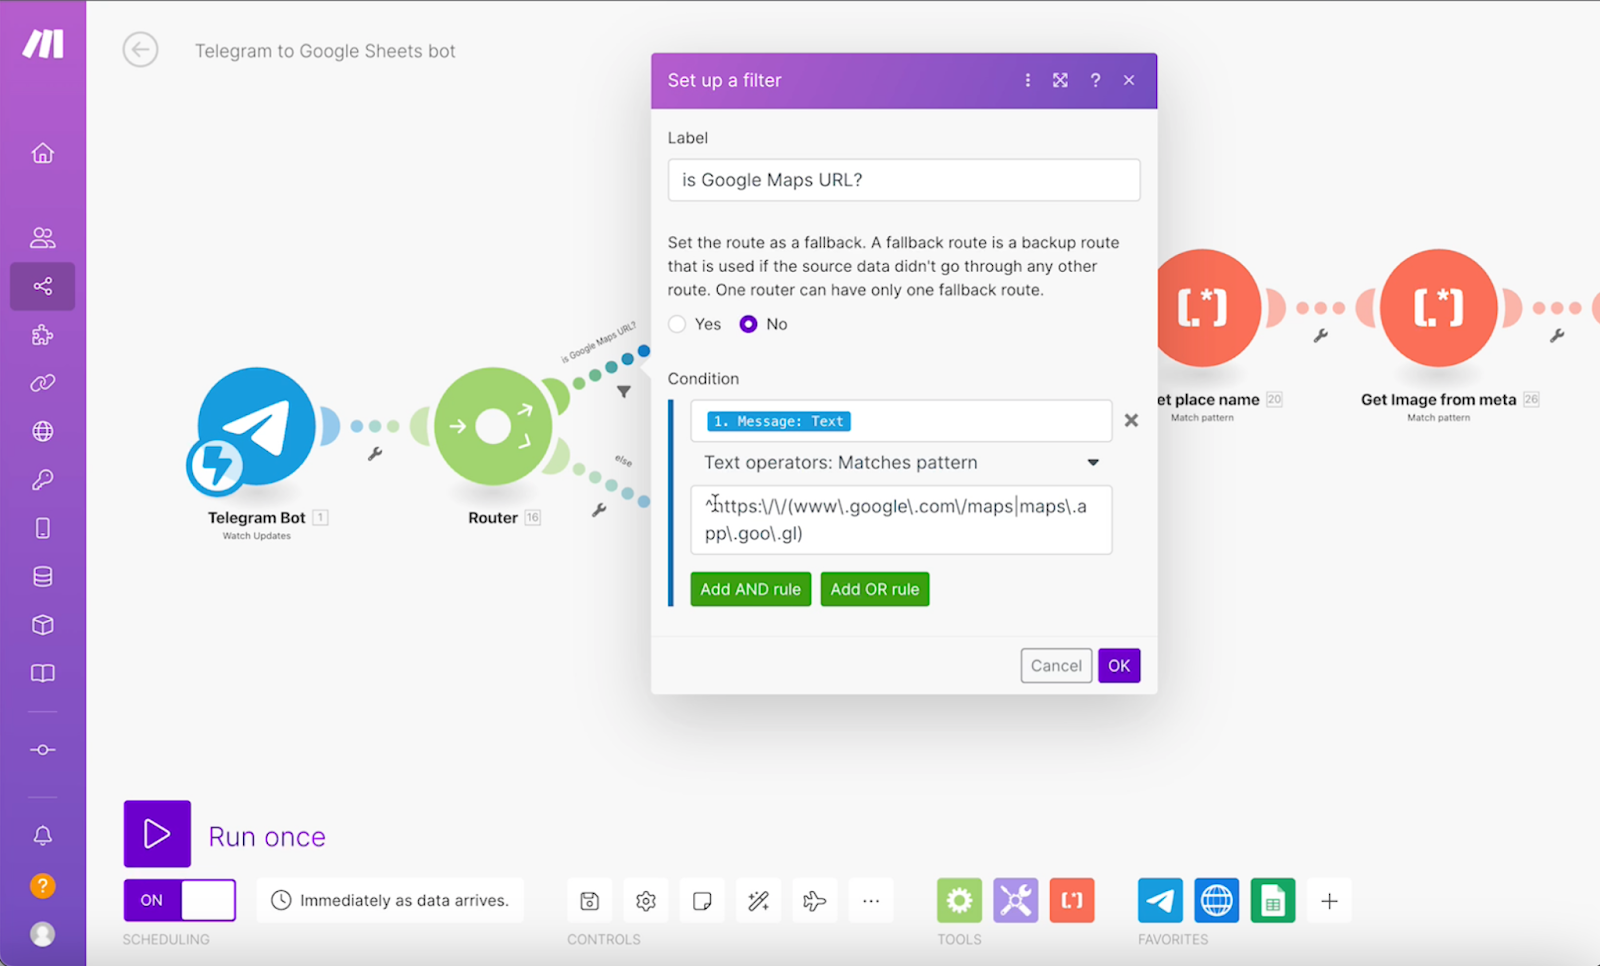
Implement the Router to determine the path based on certain criteria, using a regular expression to check if the provided message is a Google Maps URL.
1. Configure the Router’s filter: select “Message: Text” in the “Configuration” field.
In the “Operators” field, select “Matches pattern” and input: ^https:\/\/(www\.google\.com/maps\app\.goo\gl)
This will allow the Router to filter out and activate only those Telegram messages that contain a Google Maps URL. For other messages that don’t provide an appropriate link, we will set up a reply in step 6.
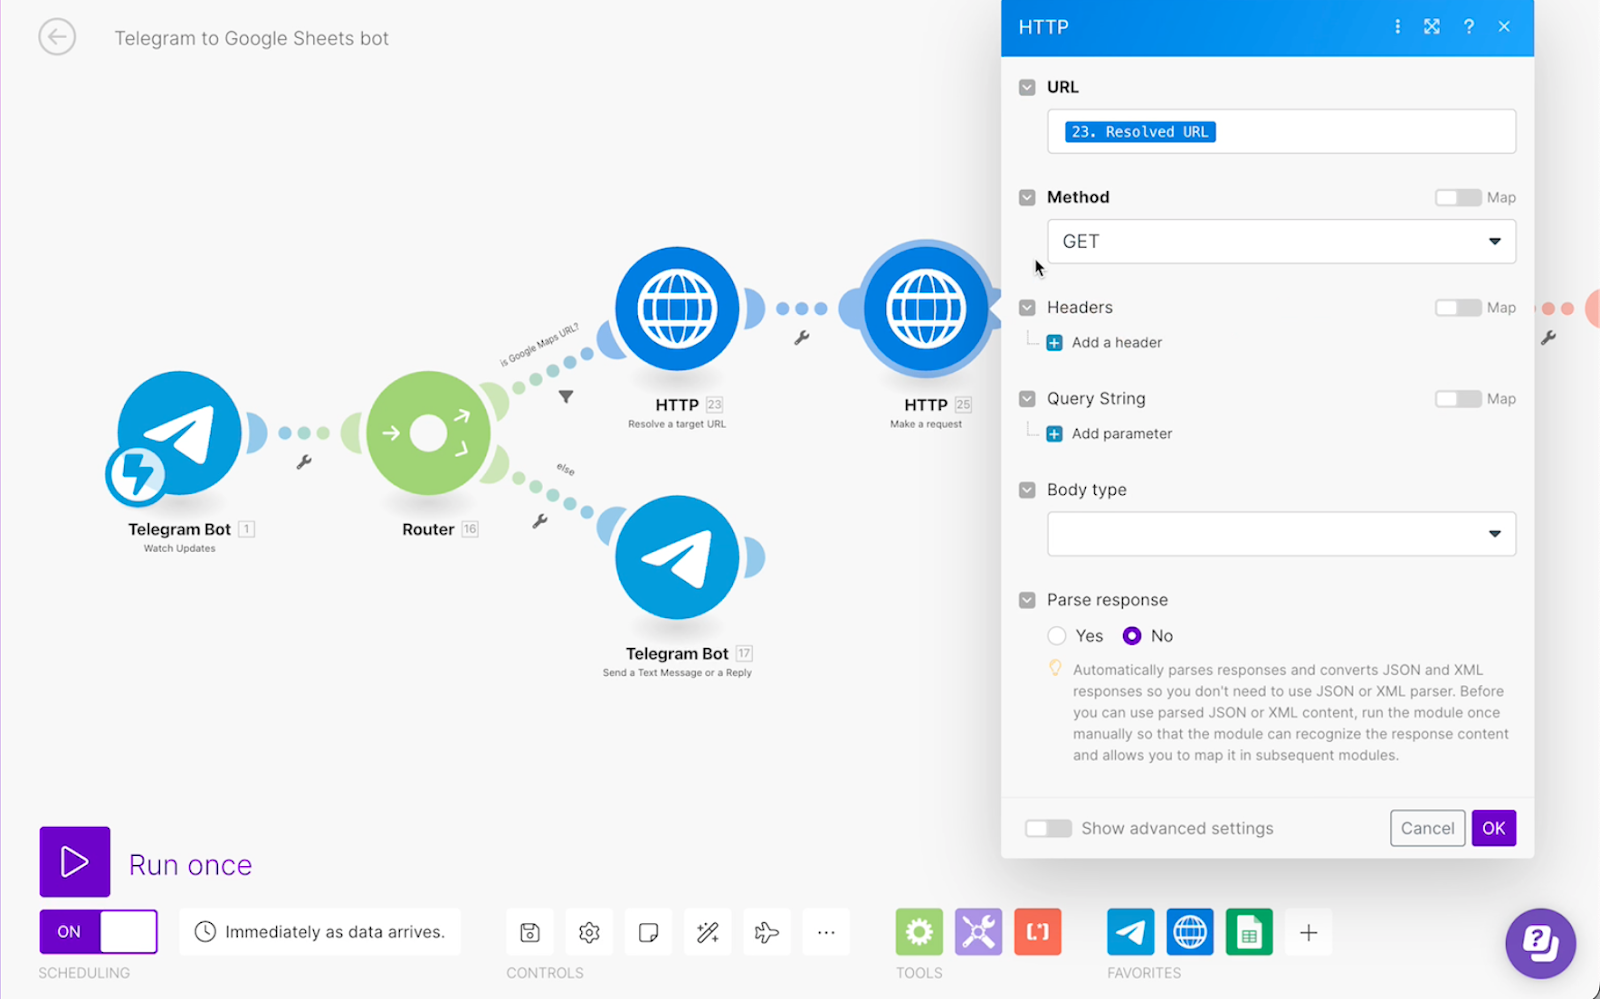
2. Add two HTTP modules following the Router. Some of the information will be extracted from the Google Maps URL. To ensure that all the data is transferred correctly even from a redirecting URL, you will need to create two HTTP modules:
The first one will resolve a redirecting URL from the message:
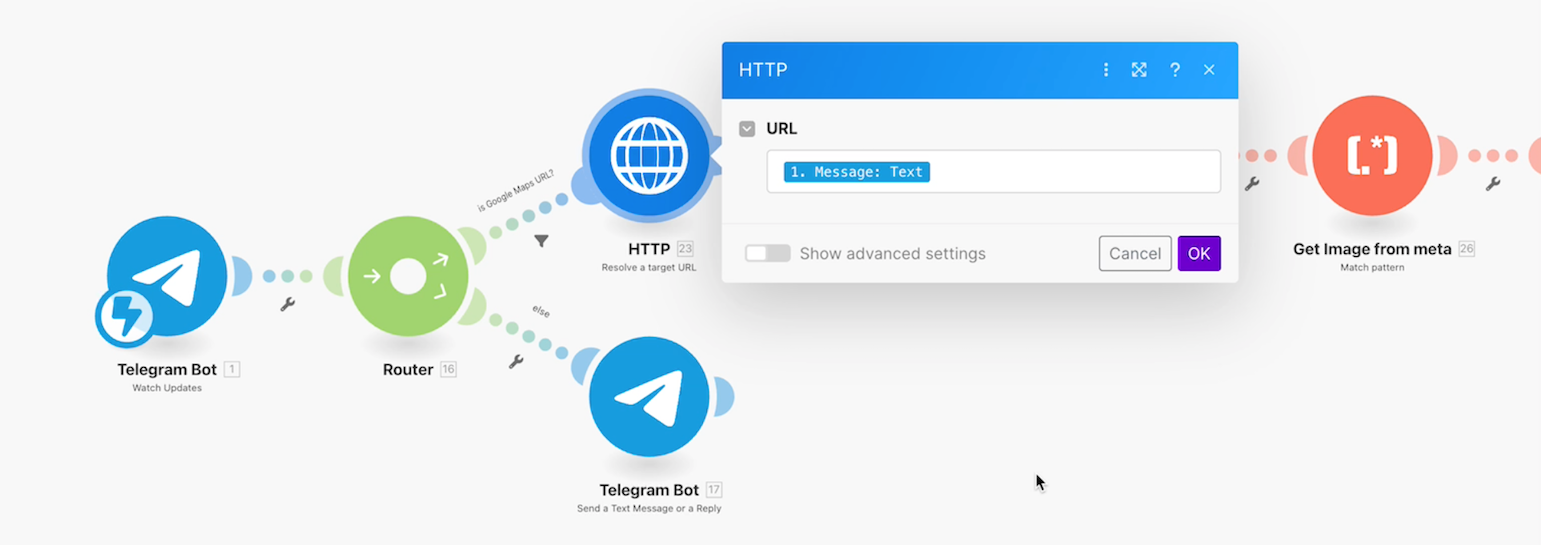
The second one will pull the information from the resolved URL:
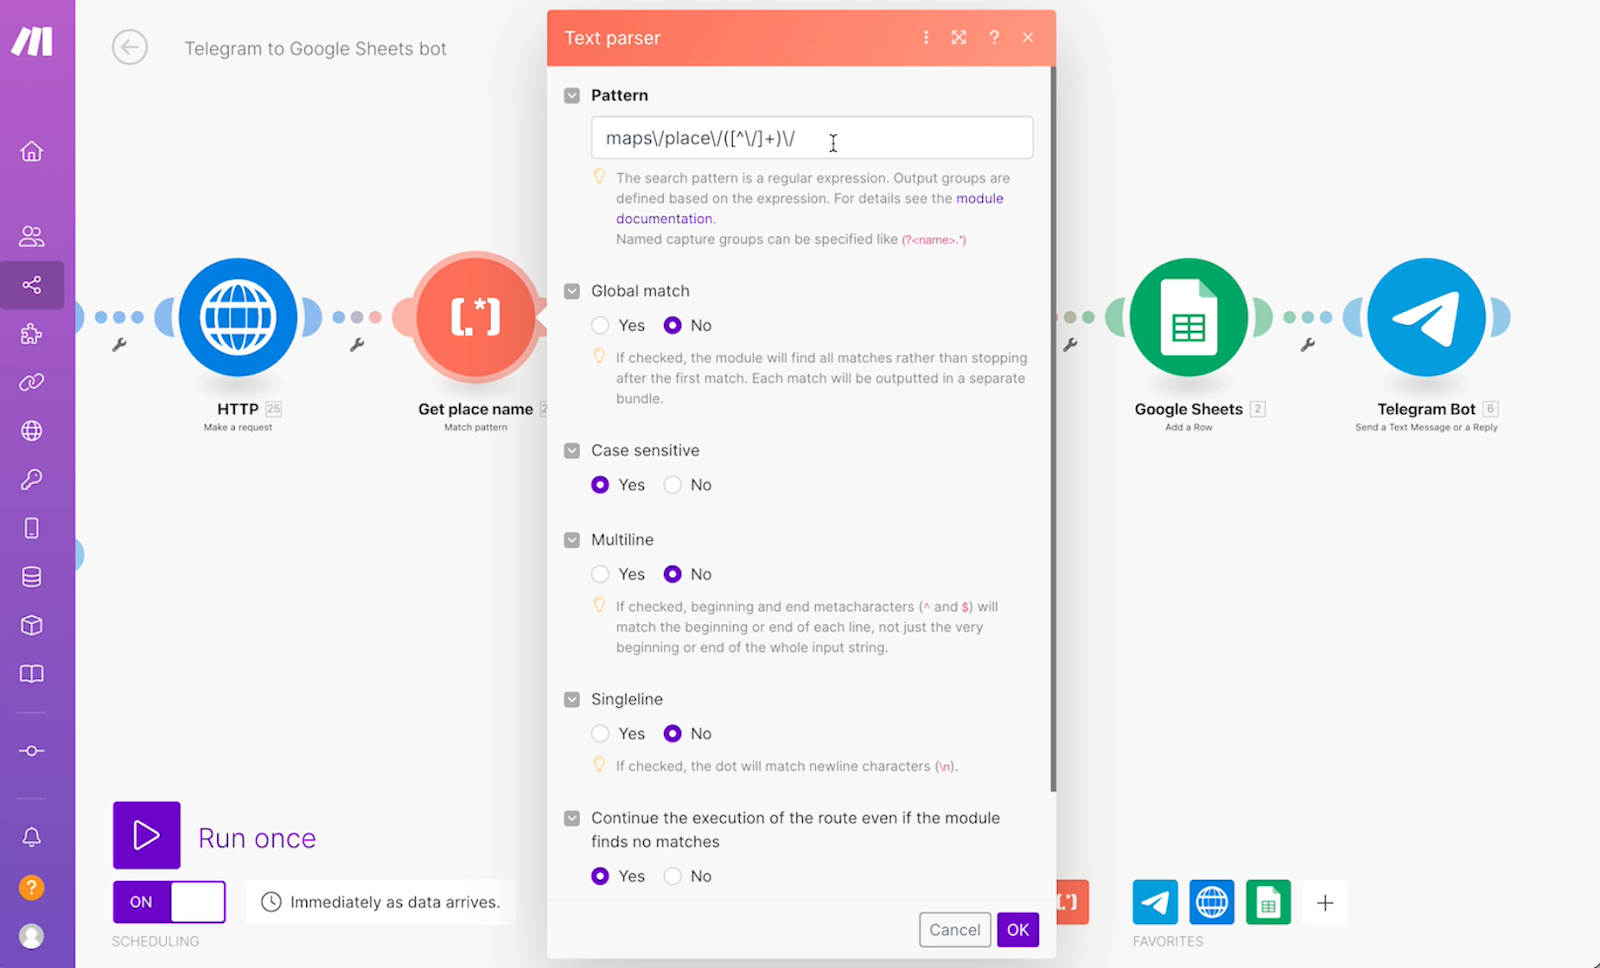
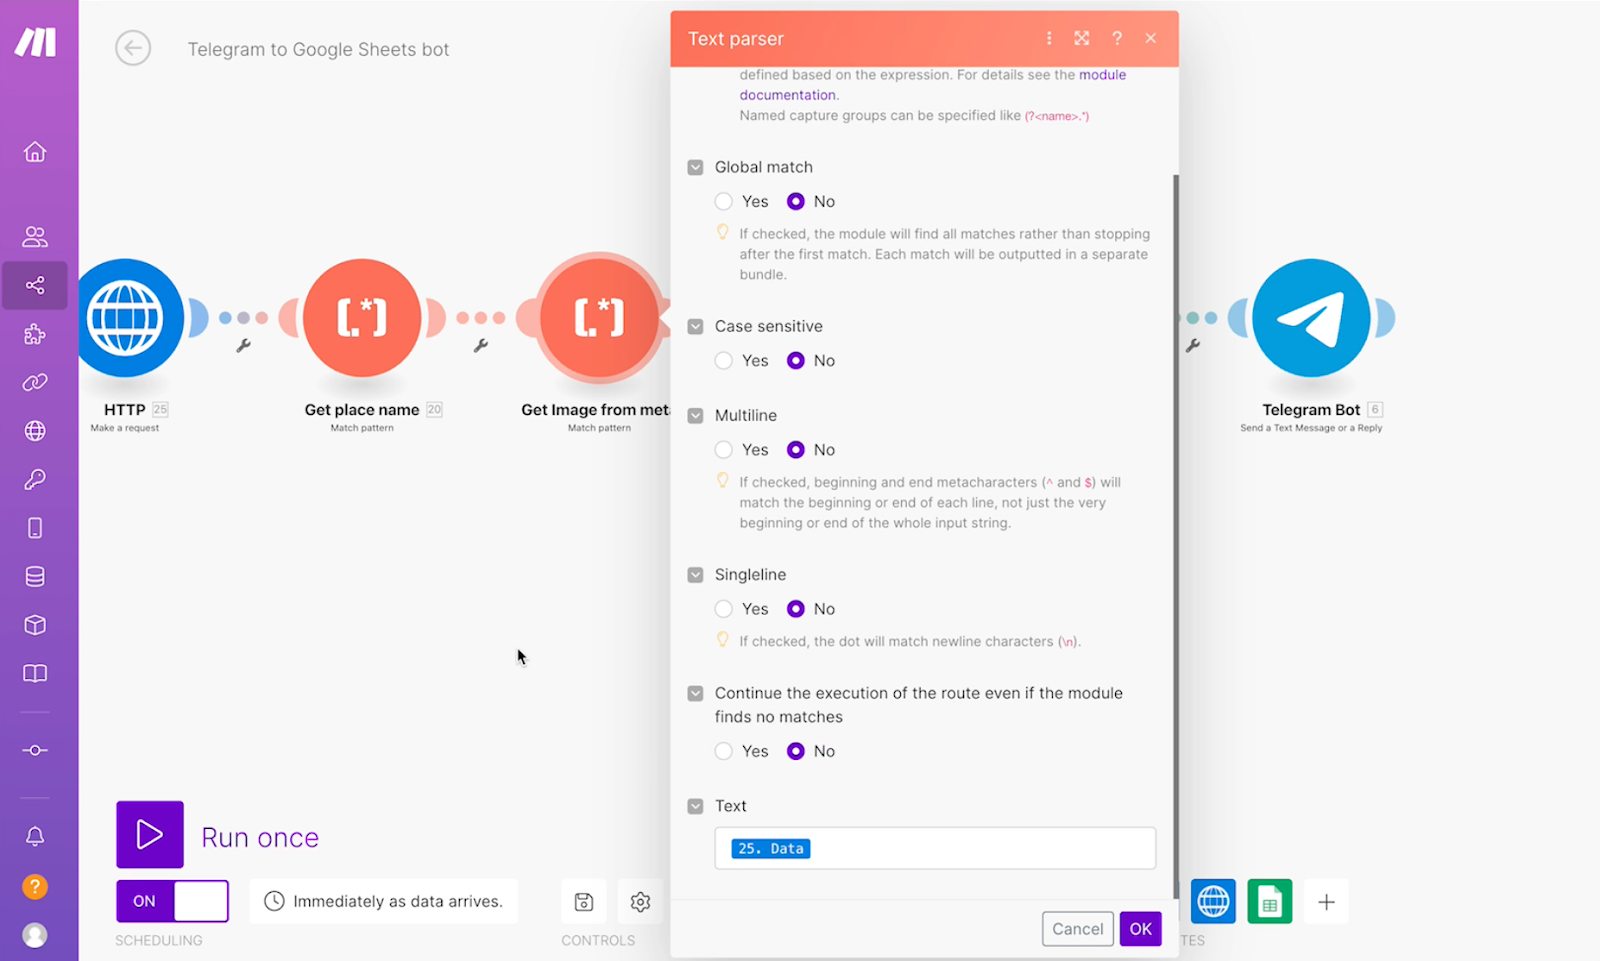
3. Add text parser modules to extract data from the URL link. Later, when you send a Google Map link to the Telegram bot, these modules will pull out such data as the name of the place, — and put it in respective columns in your Google Sheet.
To identify the name of the Google Maps place, enter in the “Pattern” field: maps\/place\/[^\/}+)\/
The field “Text” determines where the data will be pulled from. Since the name of the place is always embedded in the Google Maps URL, enter “Resolved URL” in that field.
Create another Text parser module to access the coordinates. Enter @([0-9.]+,[0-9.]+) in the field “Pattern” and select “Resolved URL” in the field “Text”.
To fetch the image of the map marker, create another Text parser module and, in the field “Pattern”, enter this regular expression: <meta\s+content="([^"]+)"\s+property/"og:image"\s+content="([^"]+)
In the field “Text”, enter “Data”.
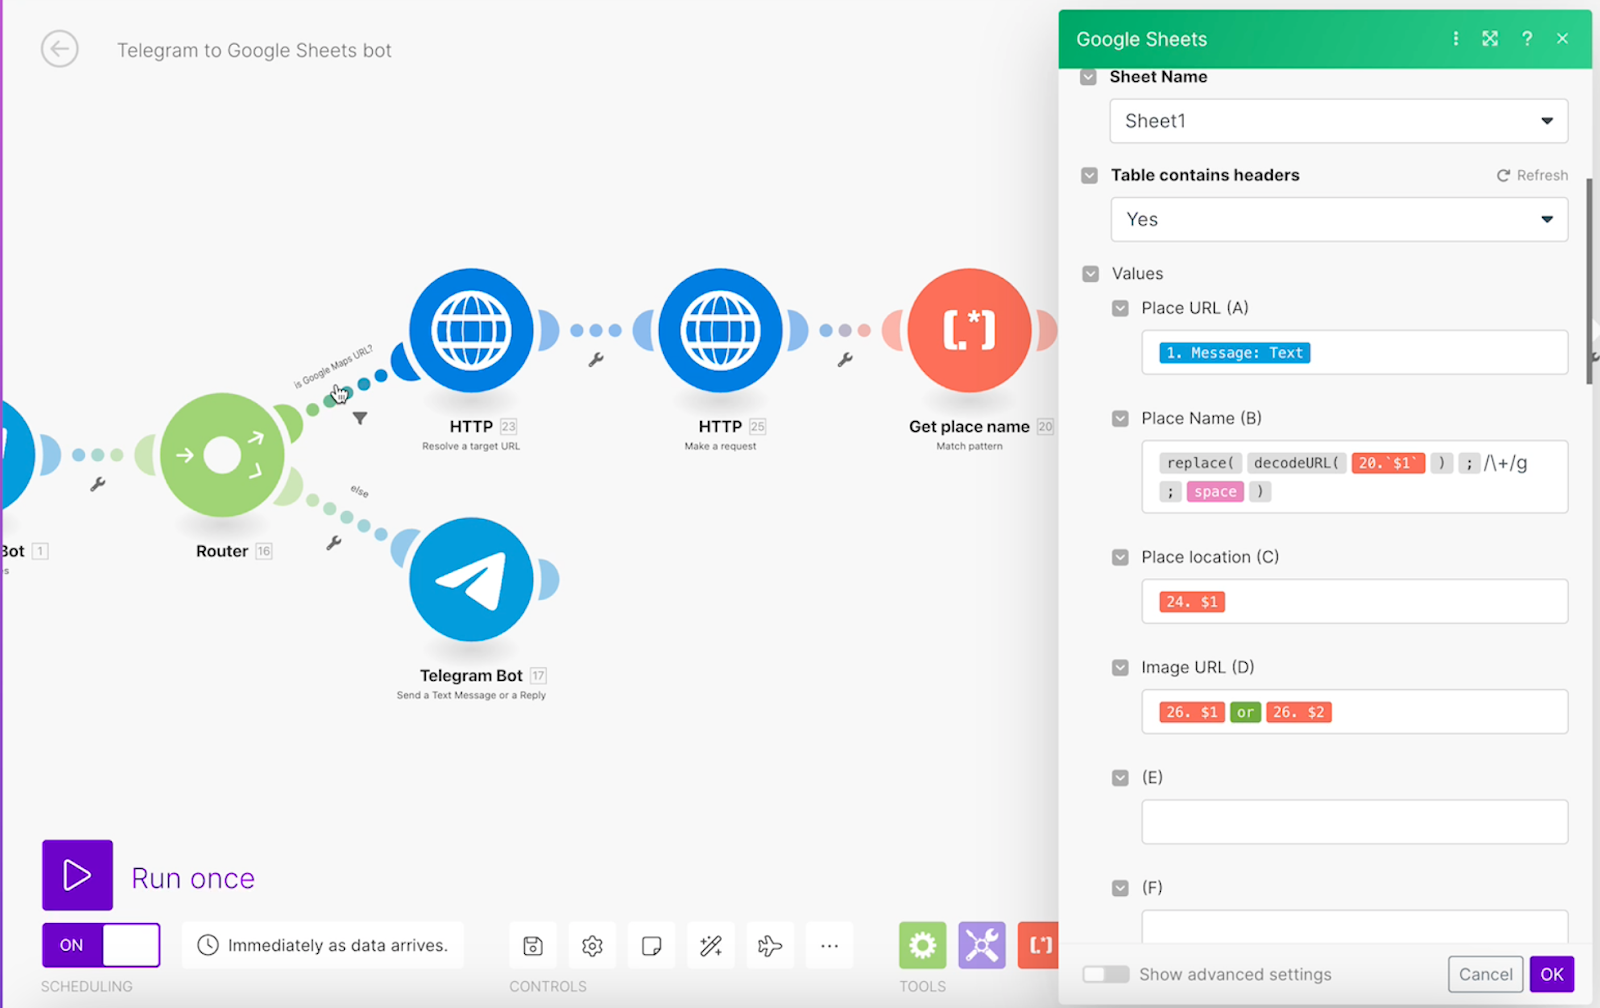
Step 4: Connect Your Website’s Google Sheet to the Scenario
Add your Google Sheet to the chain: create a new Google Sheets module and set it up as shown in this screenshot:
Step 5: Set Up the Final Telegram Response
The last step of this setup is creating an automatic Telegram response that you will get from your bot once the new row in the Google Sheet is created.
To do this, add another Telegram module, and set it up as follows in the screenshot:

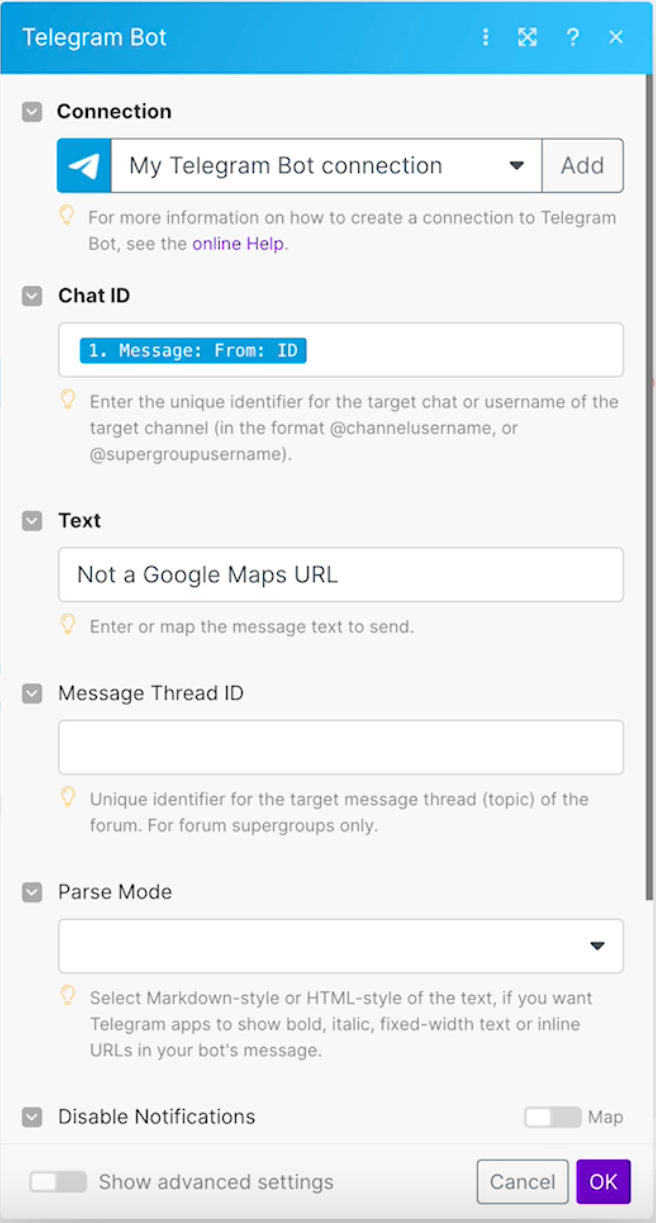
Step 6: Handle Non-URL Messages
The last step is to “teach” the Telegram bot to respond properly to messages that do not contain Google Maps links. For that, go back to the router and add another Telegram module from there. Fill in the fields as in the previous step. In the "Text" field, write "Not a Google Maps URL".
Now, when you accidentally send a random message without a Google Maps link to the bot, it will reply: “Not a Google Maps URL”.
After that is done, you can finally run and test the scenario.
Step 7: Test the Automation
Now it is finally time to test! Go to Google Maps and pick a location that you want to add to your website. Select the location and copy it's link.
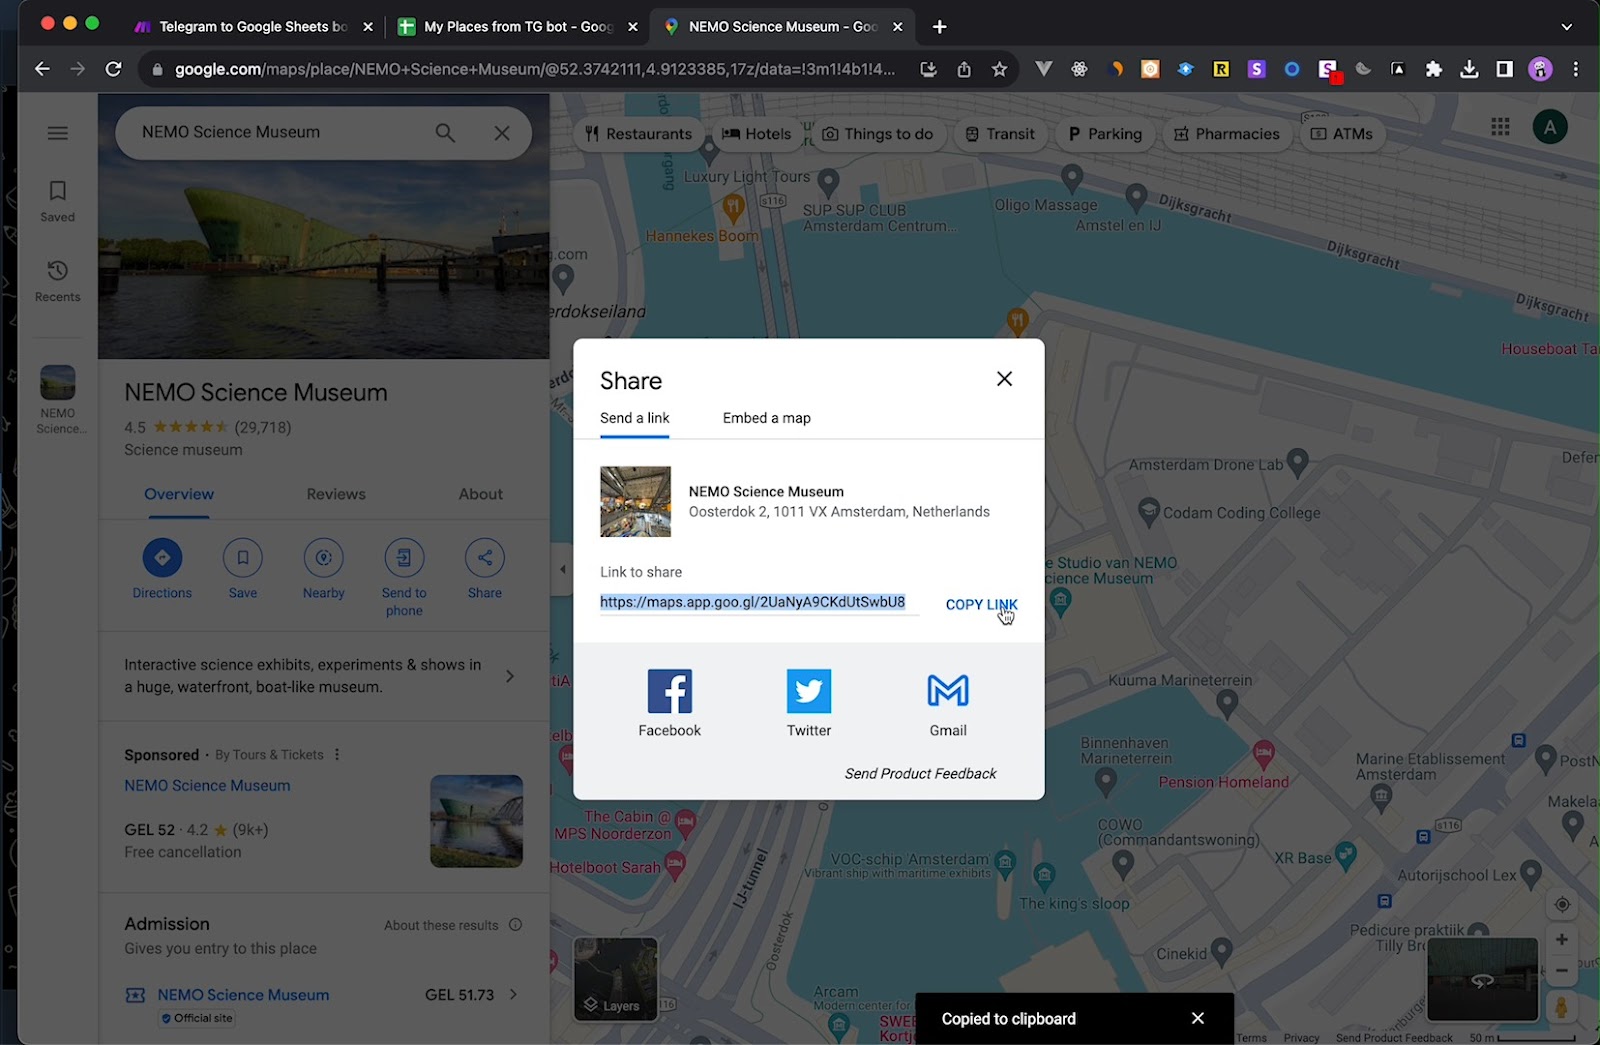
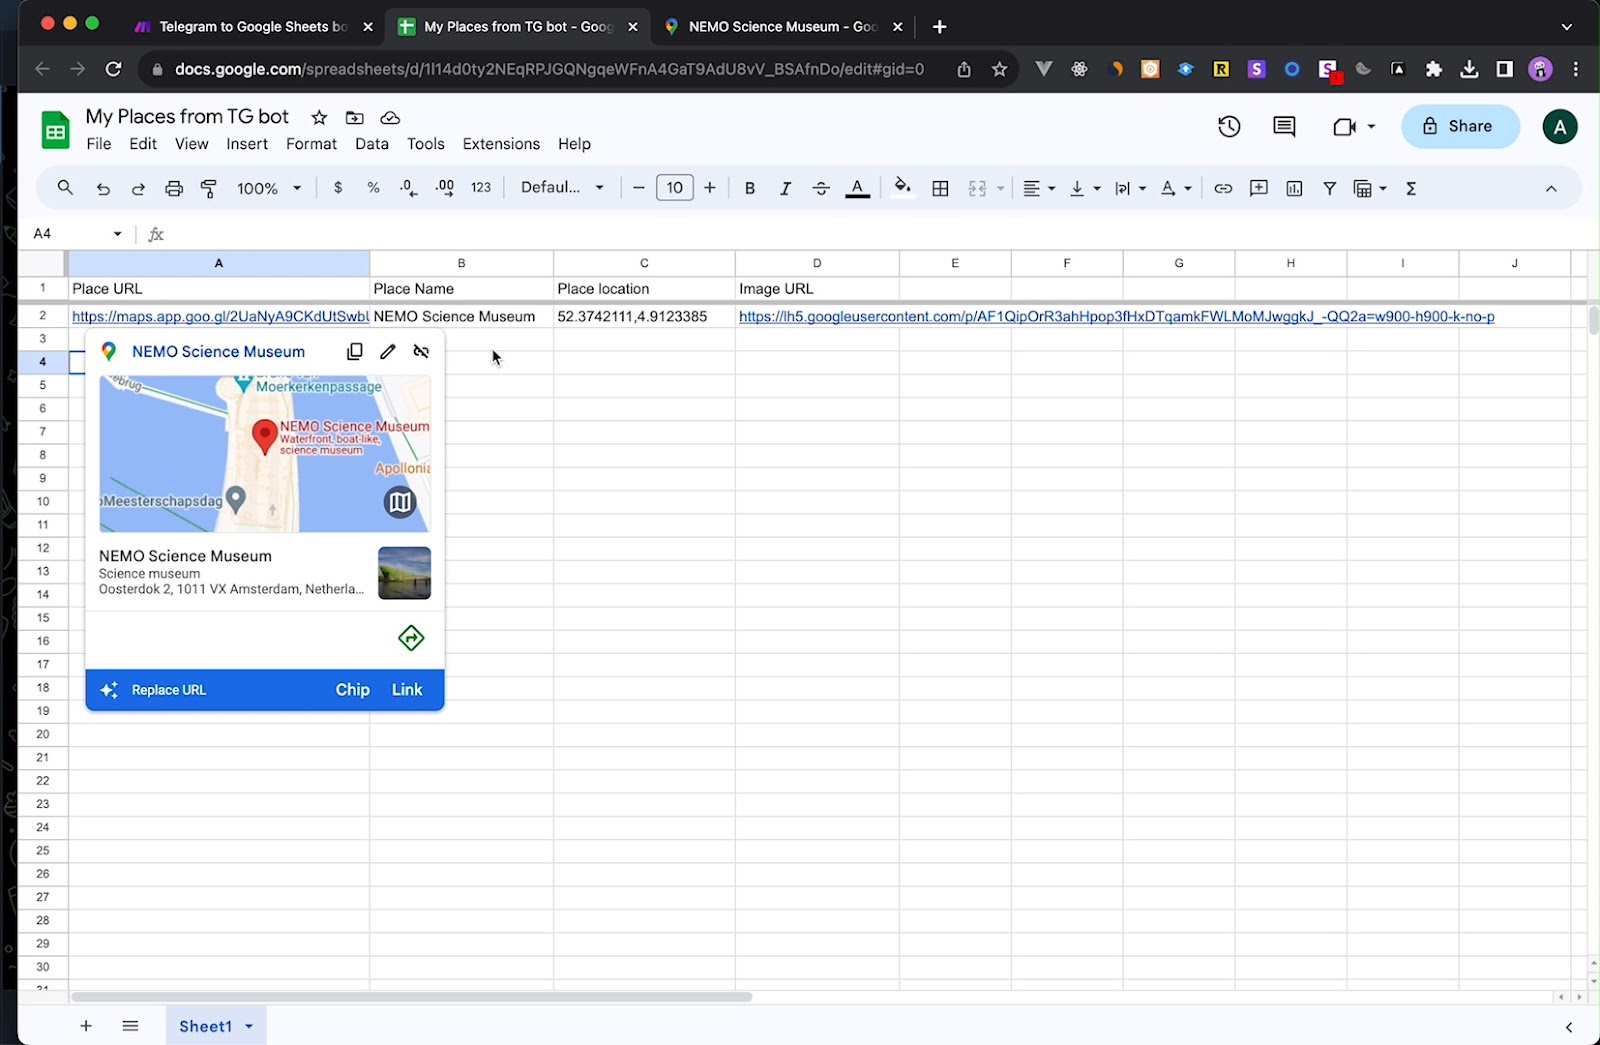
Send the link to the Telegram bot. If everything is done correctly, the bot will respond with a link to your Google Sheet.
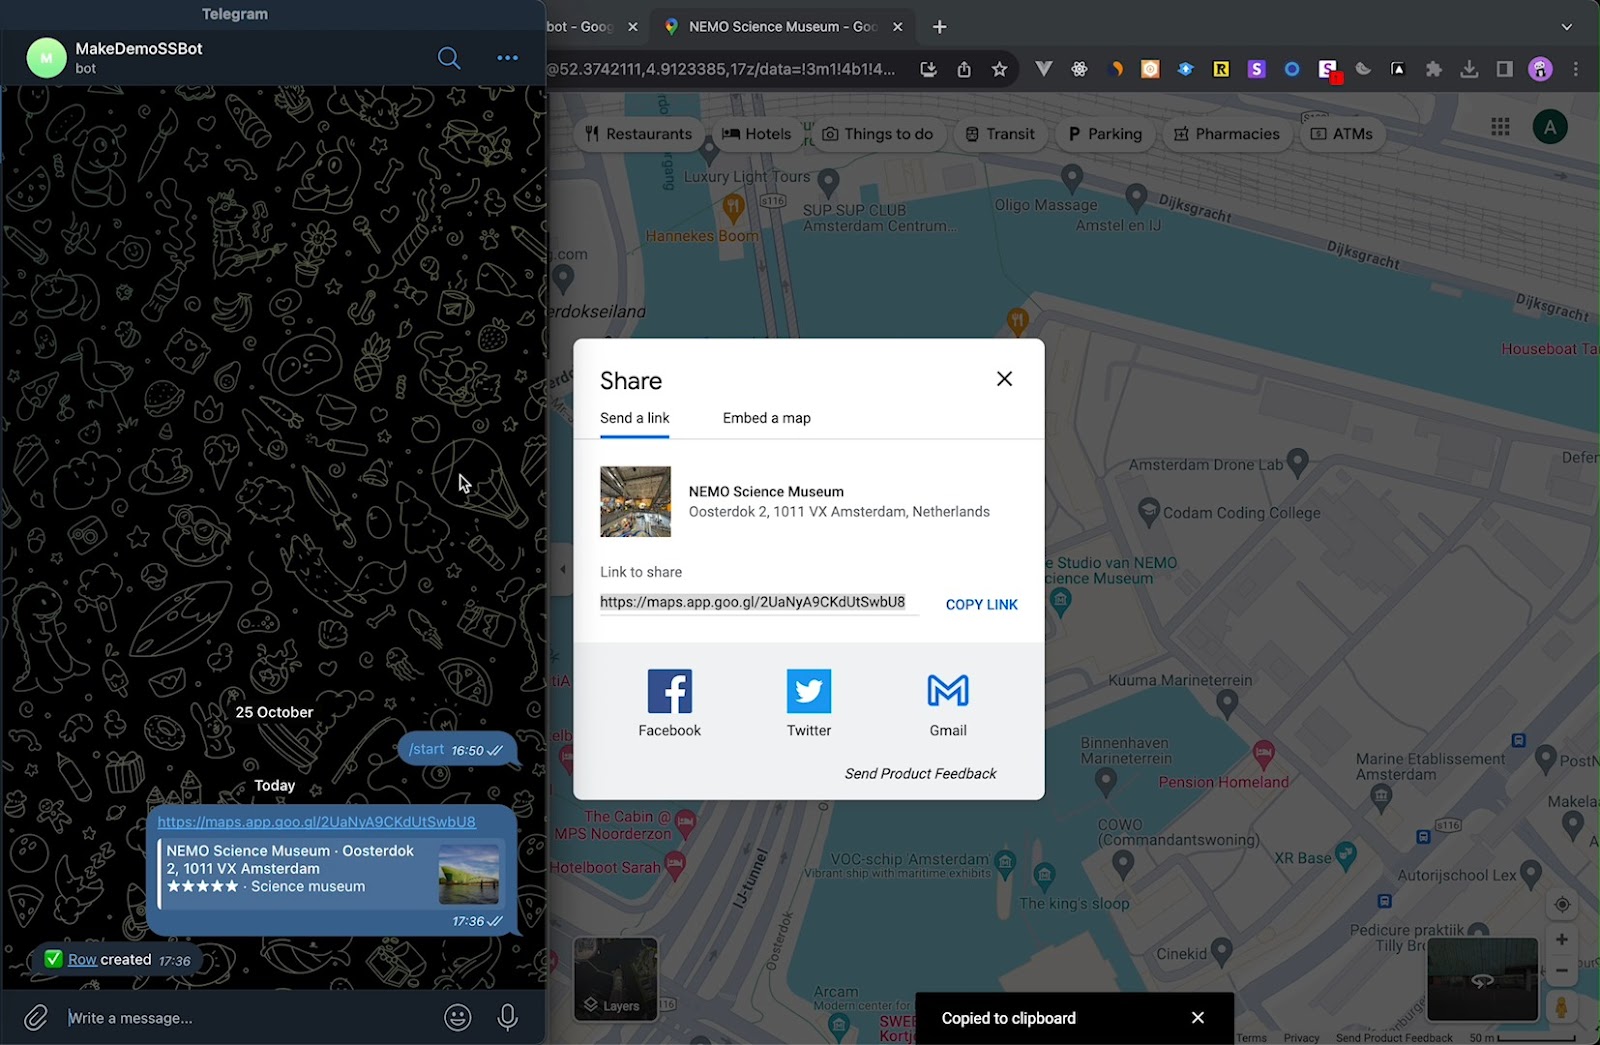
Follow the link to the document to ensure that a new row has been added, as indicated by the Telegram bot:
If the Google Sheet is already integrated with your SpreadSimple site, you can go and check the new map markers on the website.
Now, you don’t even need a laptop to add map markers to your website. Just share the link with the bot from your smartphone and be done!