Simplify Data Entry: Automate Google Sheets and SpreadSimple Website with a Telegram Bot — Your How-To Guide
This article offers a step-by-step guide to seamlessly add product links, titles, and descriptions to your SpreadSimple website. Send the URL to your Telegram Bot for automatic title and description extraction into Google Sheets. Use formulas to add your referral code and other data, and approve the content before displaying it on your website. This automated process streamlines affiliate marketing content management efficiently.
Affiliate marketing involves various repetitive responsibilities, such as adding and monitoring links. These tasks can quickly become burdensome, making automation a valuable ally. With automation, you can effectively handle these tasks, freeing you to enhance your campaigns. Efficiency is at the core of affiliate marketing. The faster and more accurately tasks are completed, the better the outcomes. This is precisely where automation plays a pivotal role. It's not merely a convenience; it's an essential tool for contemporary affiliate marketers aiming to maintain a competitive edge. In this article, we will explore how tools like Telegram Bot, Google Sheets, and SpreadSimple can assist in streamlining and optimizing your workflow.
The tech stack used in this tutorial
Telegram Bot
- Assists with real-time data management.
- Transfers URLs into our automation.
You can create your own Telegram bot using the instructions provided below.
Google Sheets
- We will use your Google Sheet, which is linked to your SpreadSimple website and works as the content management system for your site. We will add new data rows to it.
SpreadSimple
- Our no-code website builder allows you to create a website from any Google Sheet without much effort.
Make.com
- A zero-code service for configuring integrations between various apps and data transfer between them. We will use it to set up our automation.
In affiliate marketing, there are a lot of tedious tasks like taking notes and manually entering data which can be prone to mistakes and time-consuming. Automation can make these tasks easier by speeding up data entry and avoiding errors.
Step-by-step Guide to Setting up the Automation
Preparation
Point 1: Preparing Your SpreadSimple Website
Create and publish a website on SpreadSimple. If you already have one, skip this step and proceed to point 2.
To quickly set up a website using SpreadSimple, you'll need to sign up https://spreadsimple.com/ , choose a template, and link your Google Sheet with your catalog data or fill the template Sheet with your products.
You can find a detailed explanation of how to create a website on SpreadSimple in this article: How to Create a Website on SpreadSimple.
Point 2: Setting Up Your Telegram Bot
To enable the integration, you need to create a Telegram Bot. Detailed instructions for this process can be found within the Make.com service at Create a Telegram Bot on Make.com. Here's a concise guide:
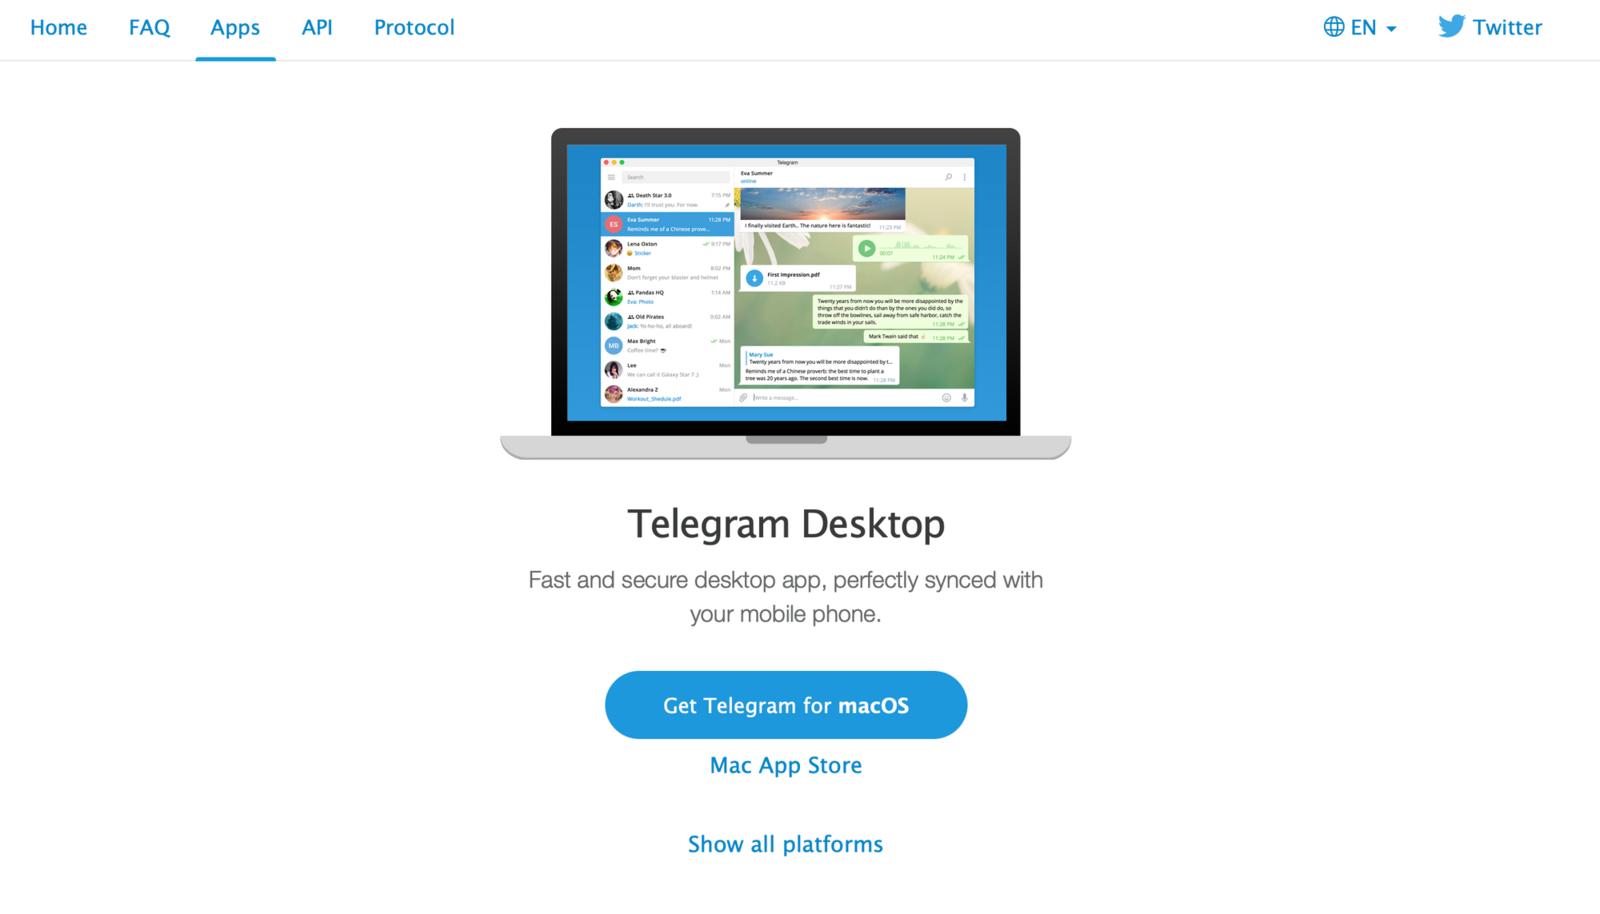
- Ensure you have the Telegram app installed and configured. You can download the Telegram Desktop app from desktop.telegram.org. Keep in mind that using the Telegram app requires providing your mobile phone number.
- Configure your Telegram Bot:
- Visit https://telegram.me/BotFather.
- To create a new bot, simply type /newbot in the message input box and press Enter.
- Provide a name and username for your newly created bot.
- BotFather will send you a message containing a token. This token is crucial for connecting your Telegram Bot to Make.com.
- To add your bot to your Telegram application, you can either click the link provided in the message from BotFather or manually enter it into your browser. The link format will be t.me/yourBotName.
Point 3: Make.com Integration
For integration setup, we use the Make.com integration service. If you don't have an account yet, you will need to sign up.
These steps will prepare you for an effective setup of the automation.
Setting Up the Automation:
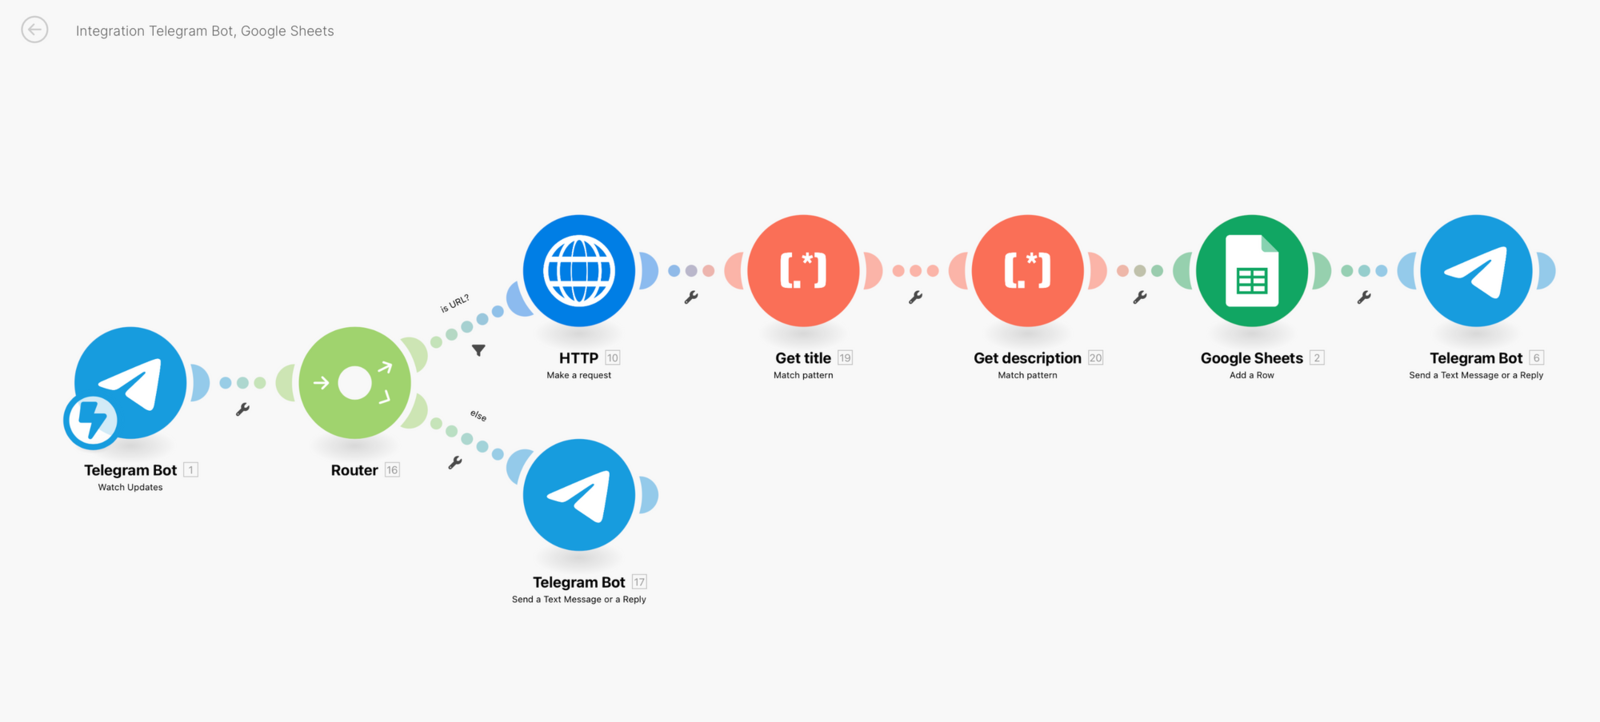
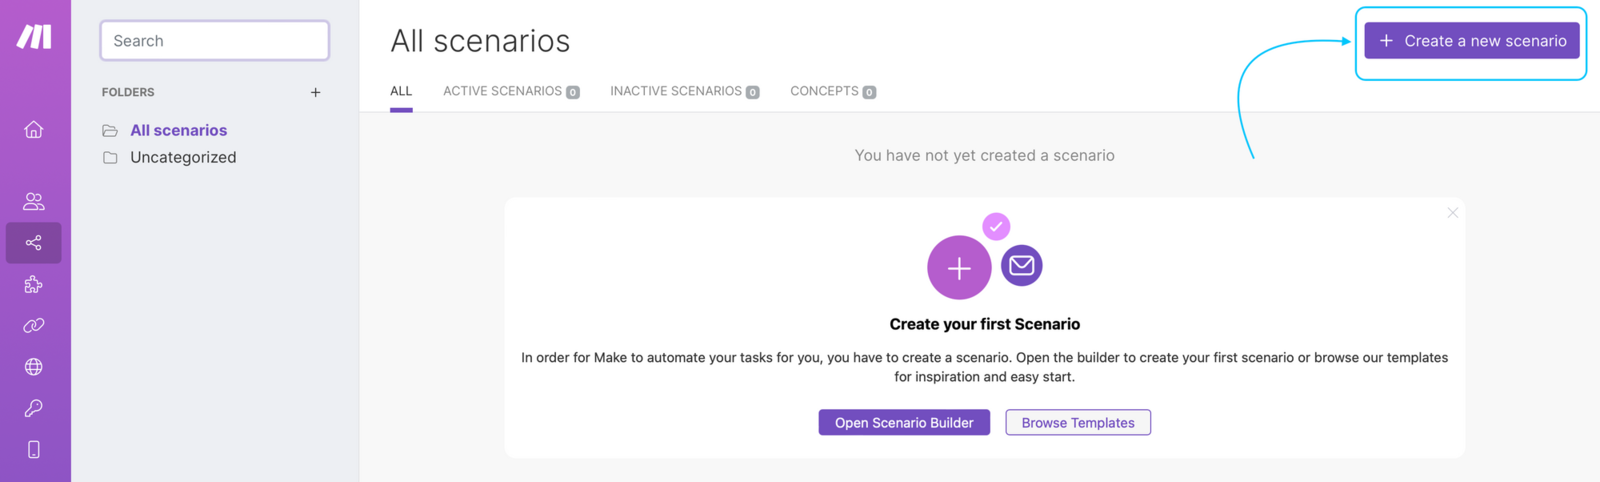
1. Create a New Automation
Begin by creating a new scenario in Make.
Select the first service for integration, which is Telegram Bot, and choose "Watch Updates".

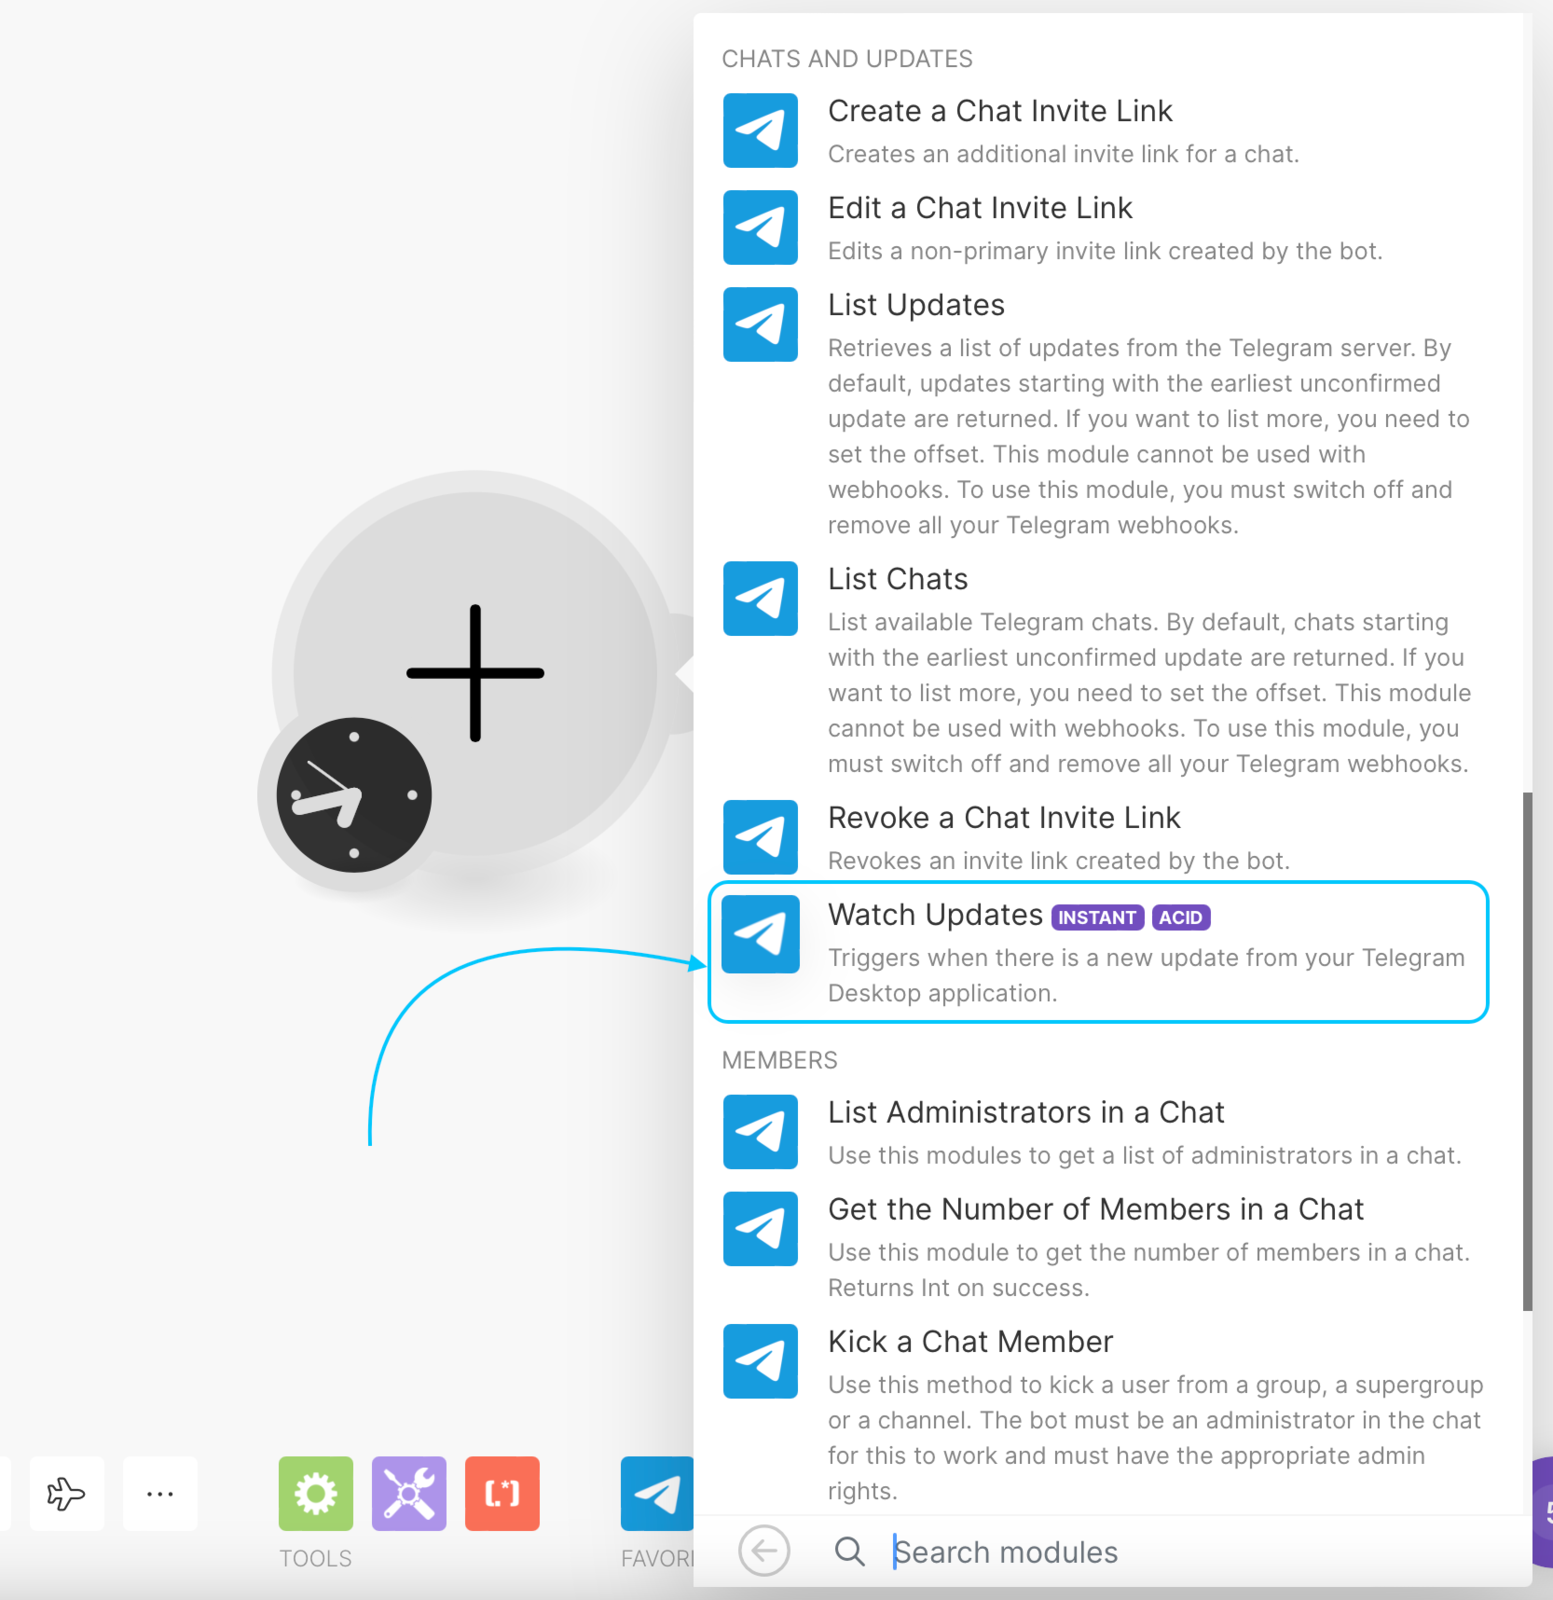
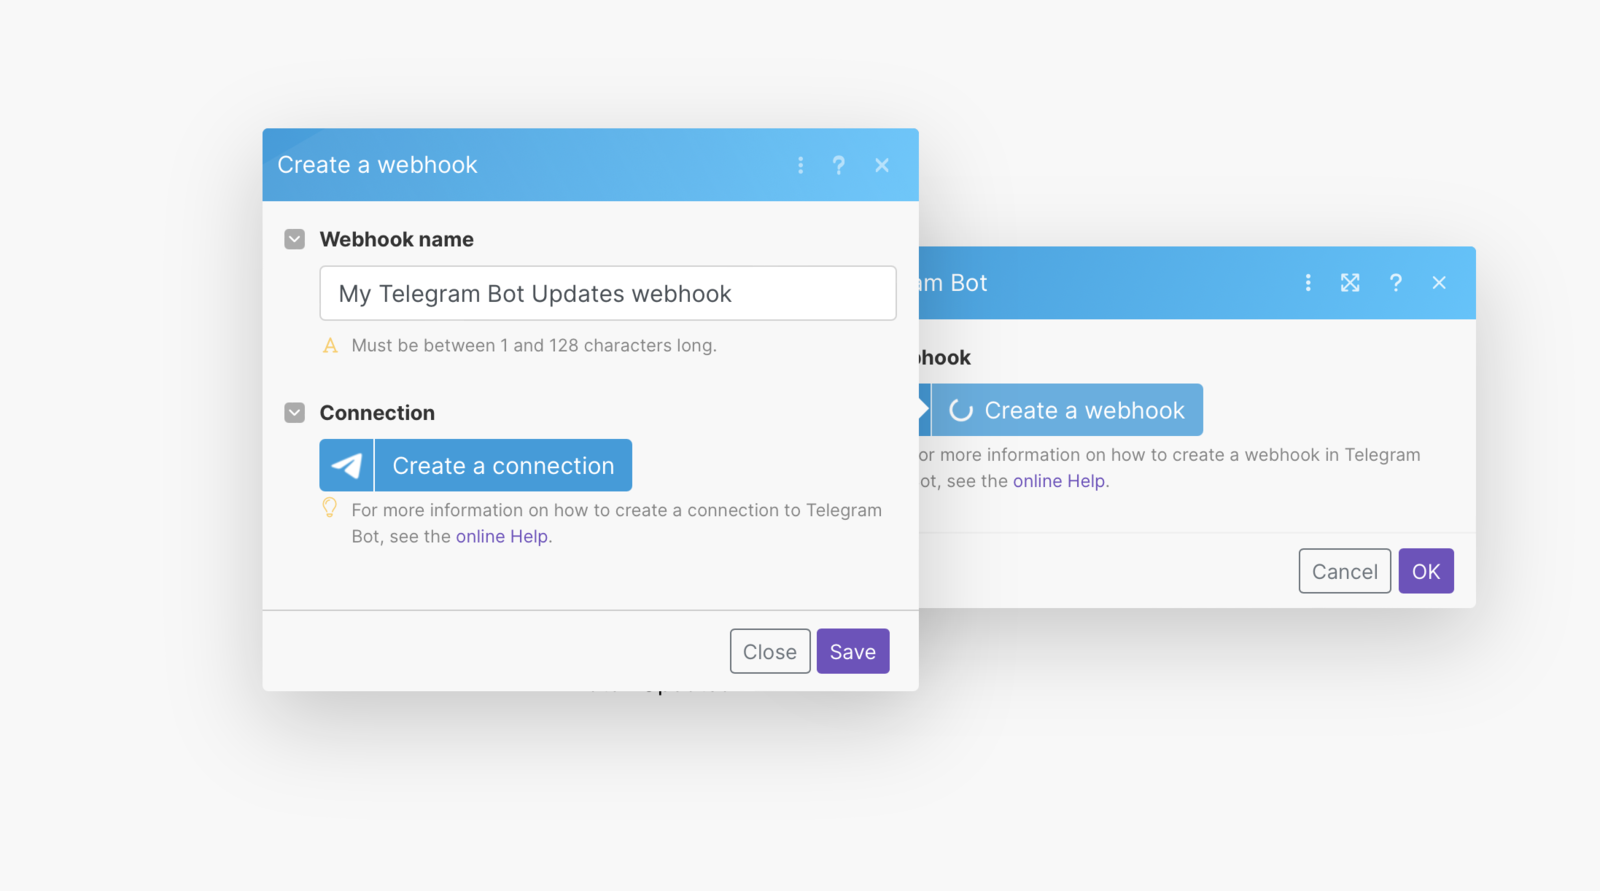
This will serve as our trigger to start the automation. Here, you will be prompted to establish a connection with your Telegram bot. It's a straightforward process where you'll need to provide the token obtained in Point 2: Setting Up Your Telegram Bot of this guide.
2. Add the Router
Now, let's add the next step, a router, which can be selected from the bottom panel using the green icon with gears labeled "TOOLS."
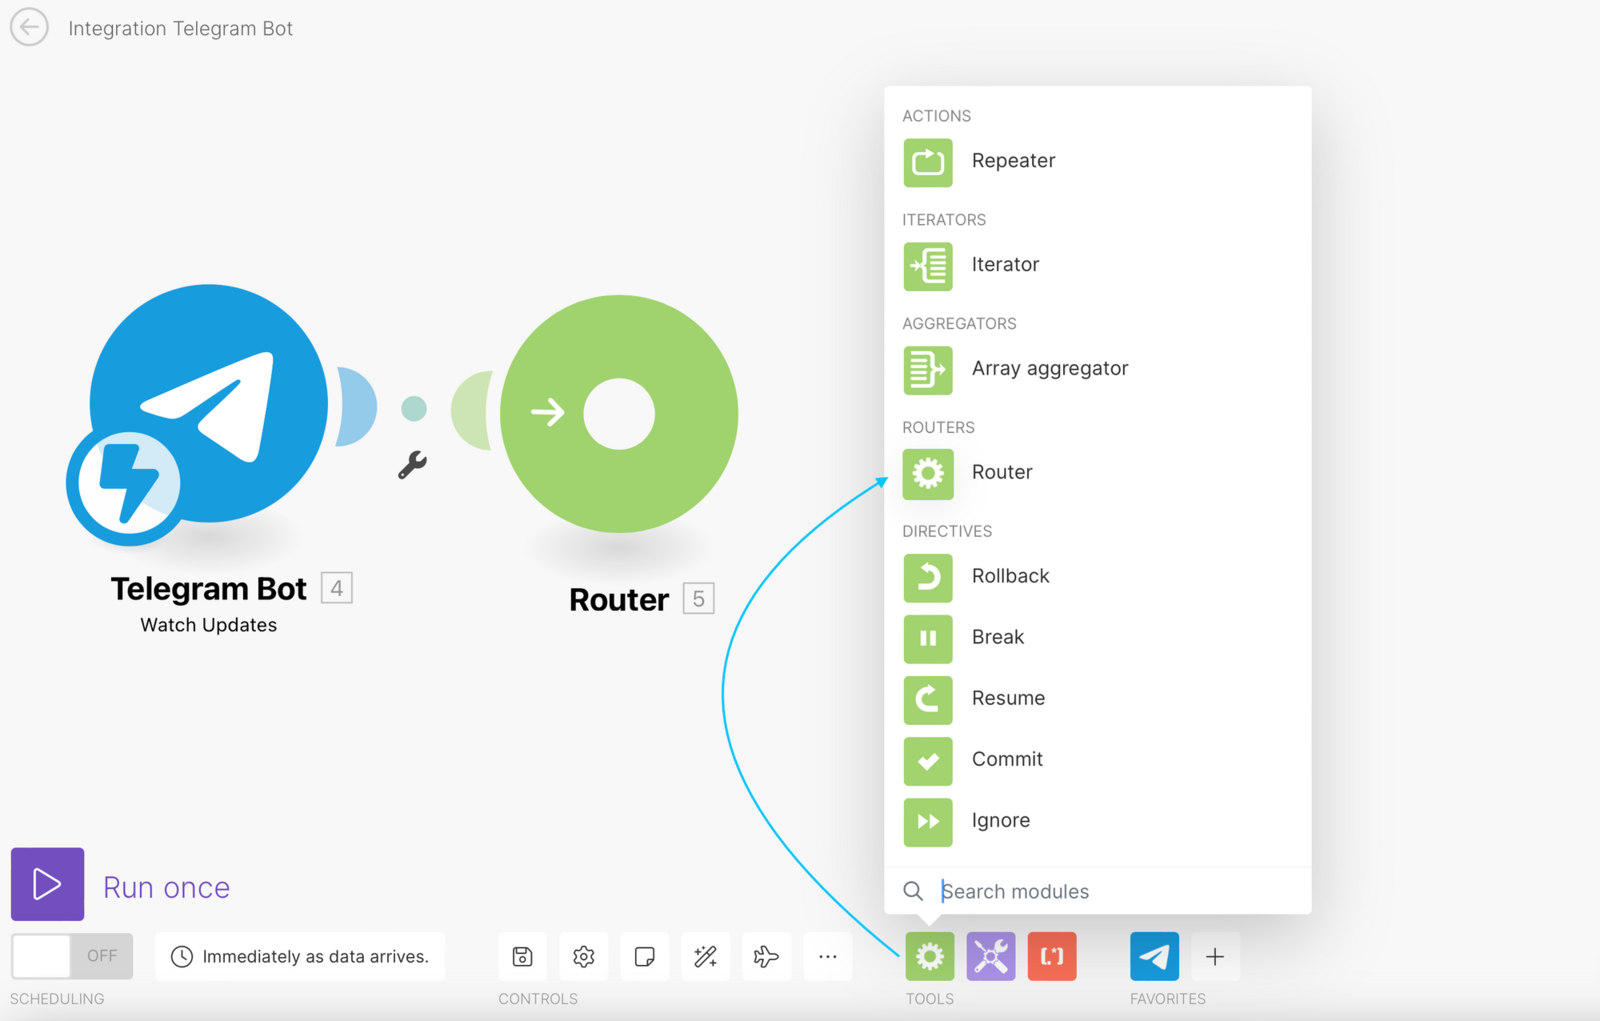
The router is essential for segmenting the actions within the automation. If the sent message contains a URL, the automation will continue to run. If the sent message does not contain a URL, the bot will return an error. We will configure a notification for this error within the Bot for our own reference.
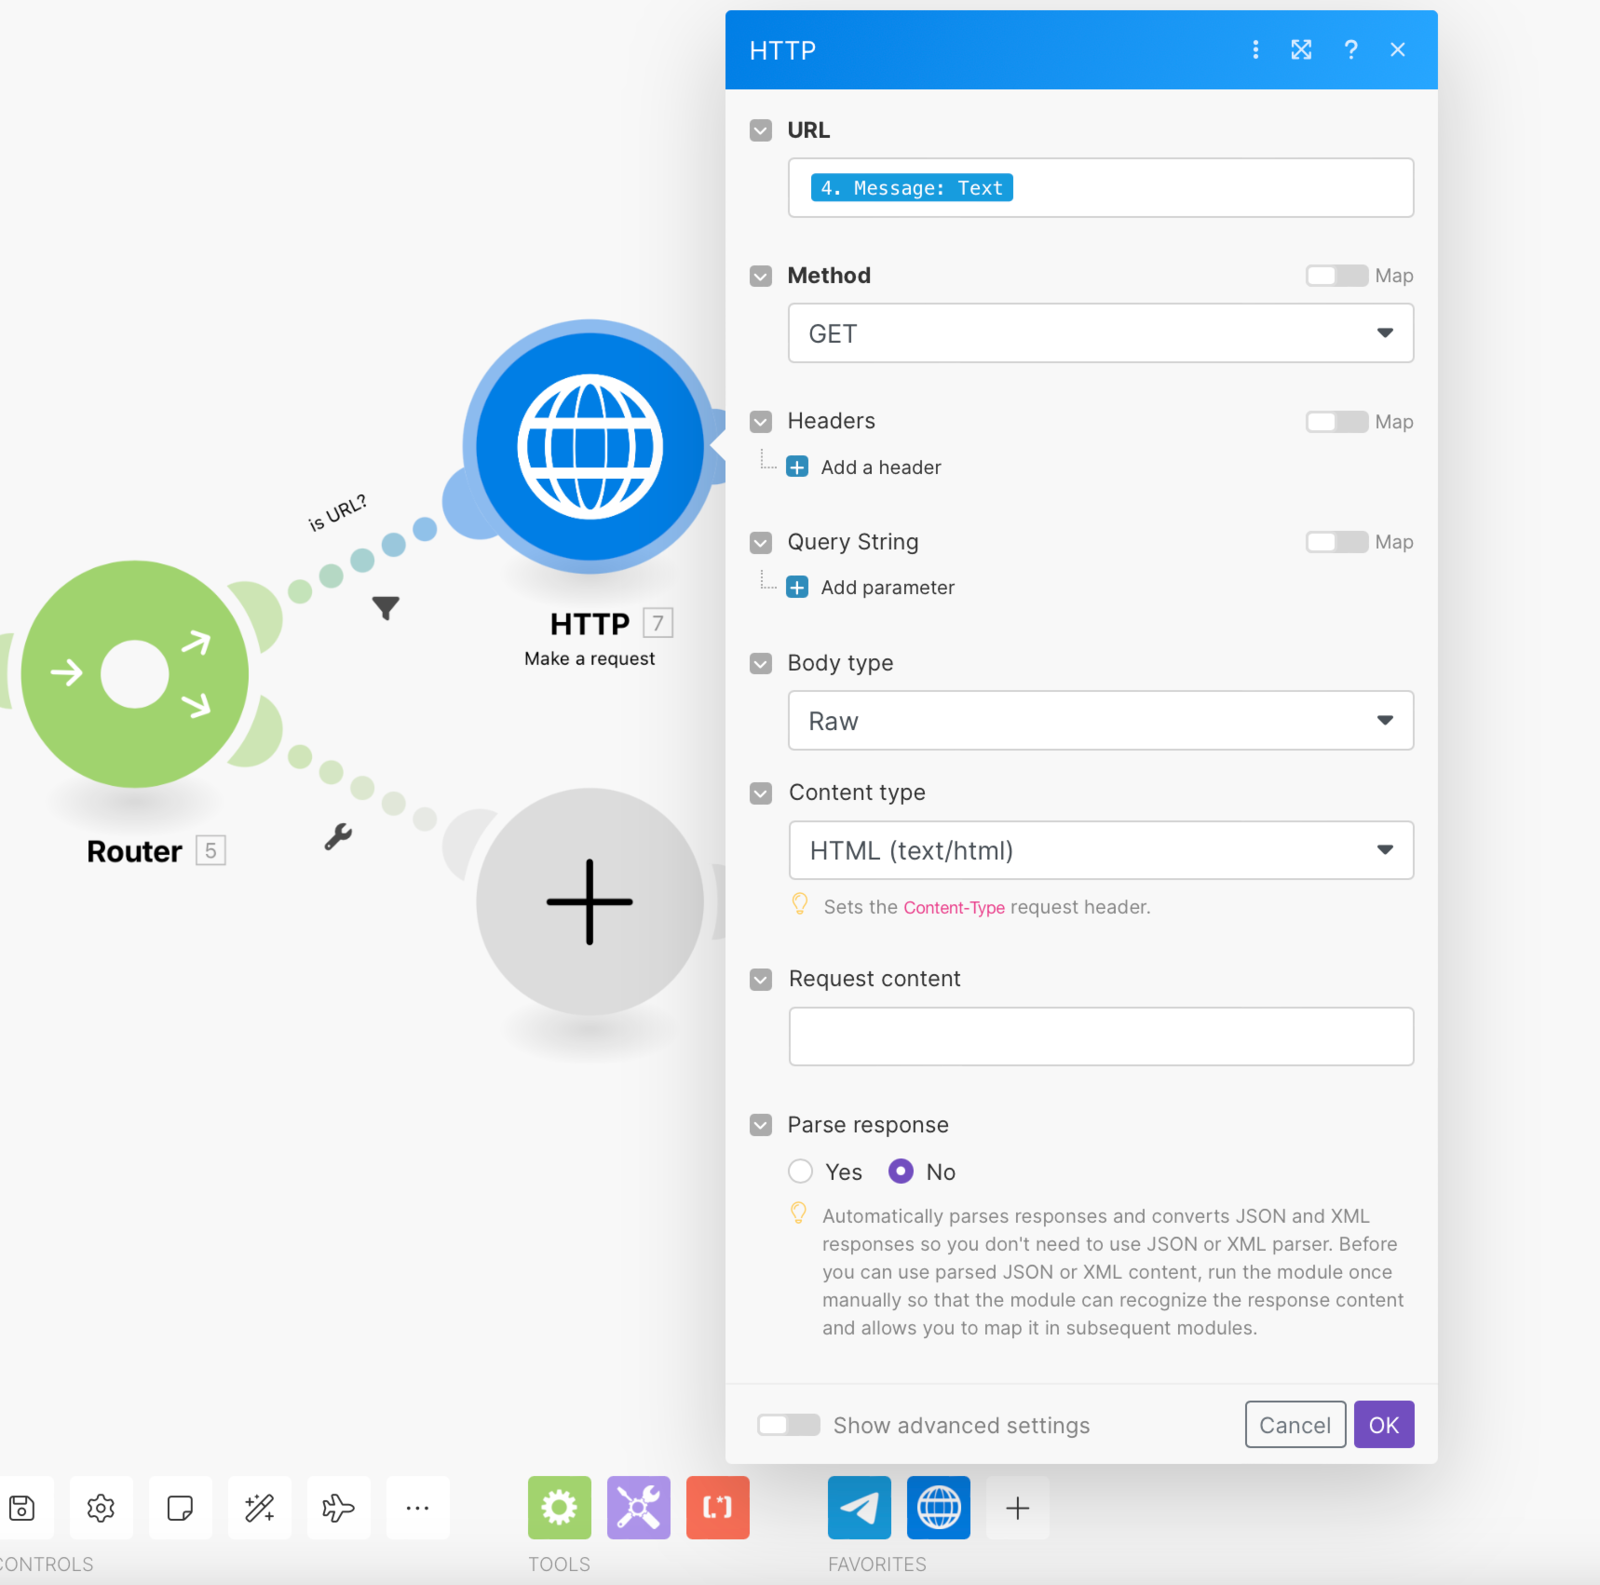
3. Adding an HTTP Module for URL Navigation
Now, add the HTTP module by selecting "Make a request." This module will initiate navigation to our URL.
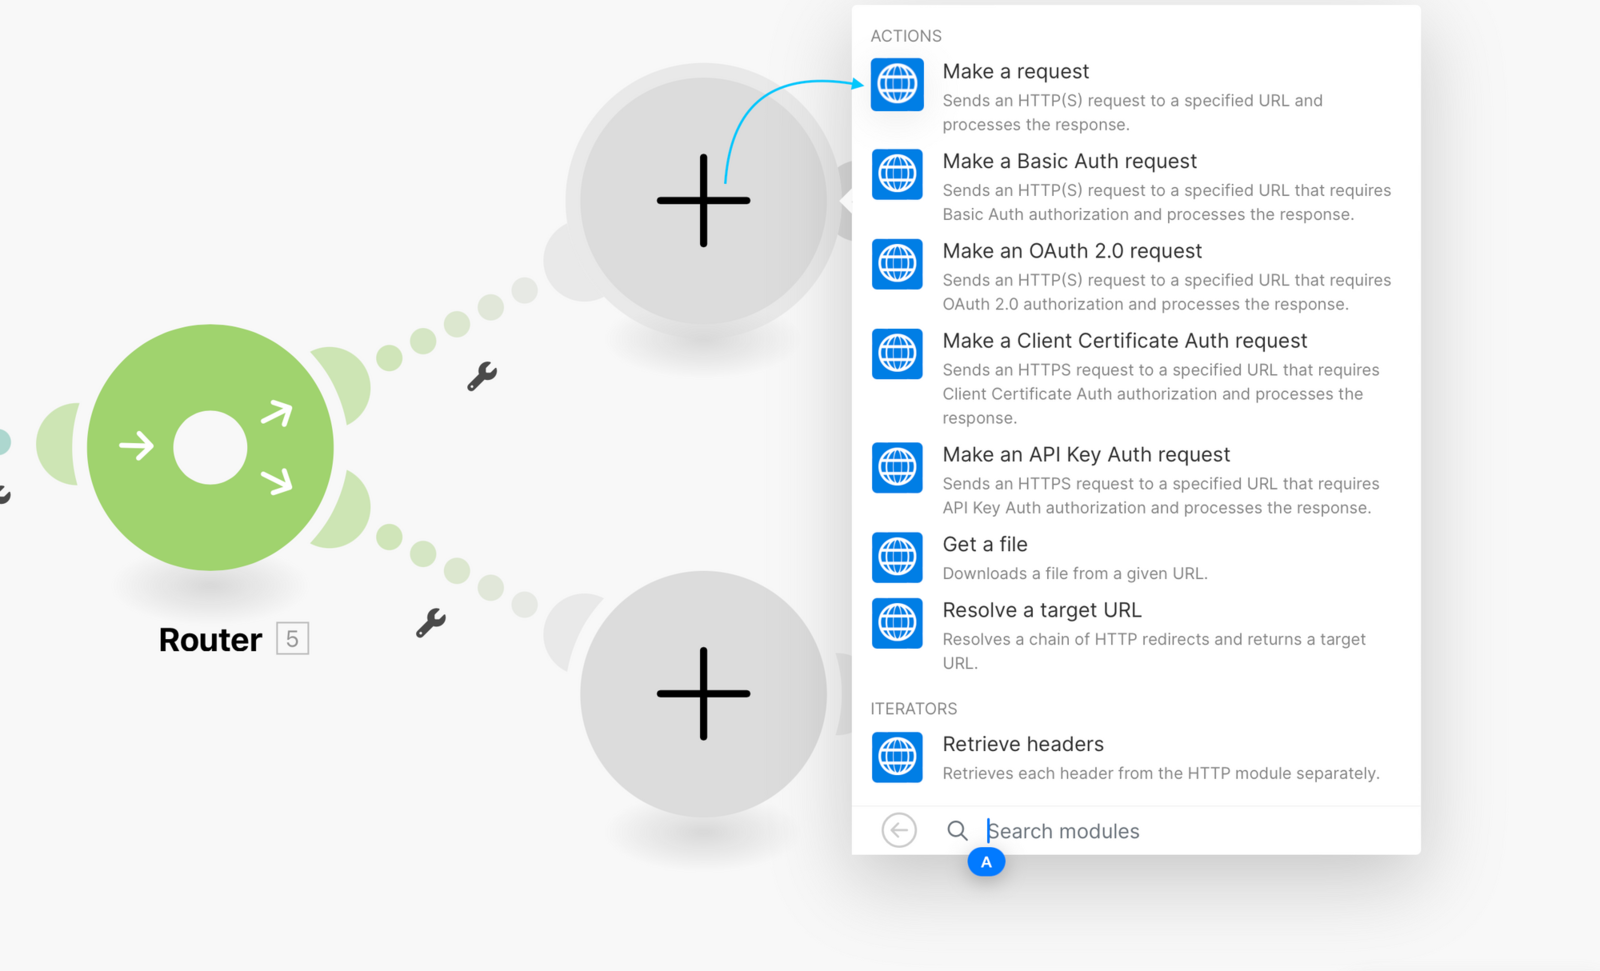
In the URL field, input "Message: Text". Set Body Type to "RAW", and in Content type, select "HTML (text/html)".

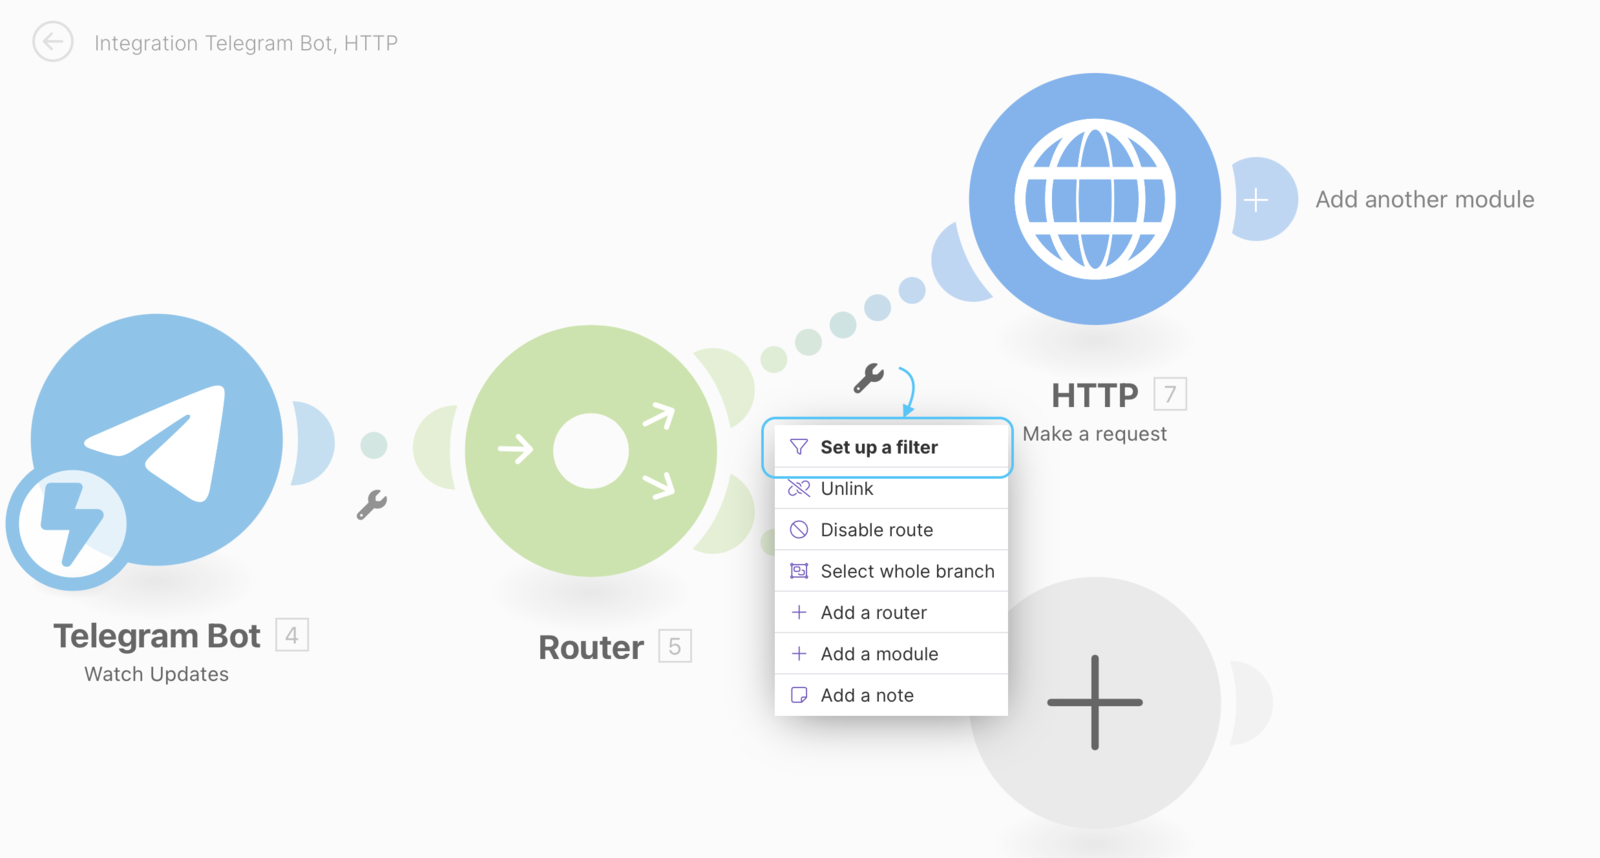
4. Configuring the Filter
To ensure the proper segmentation, configure a filter within the router.
In the "Condition" section, add "message Text" by searching for it in the list and dragging it into the window.
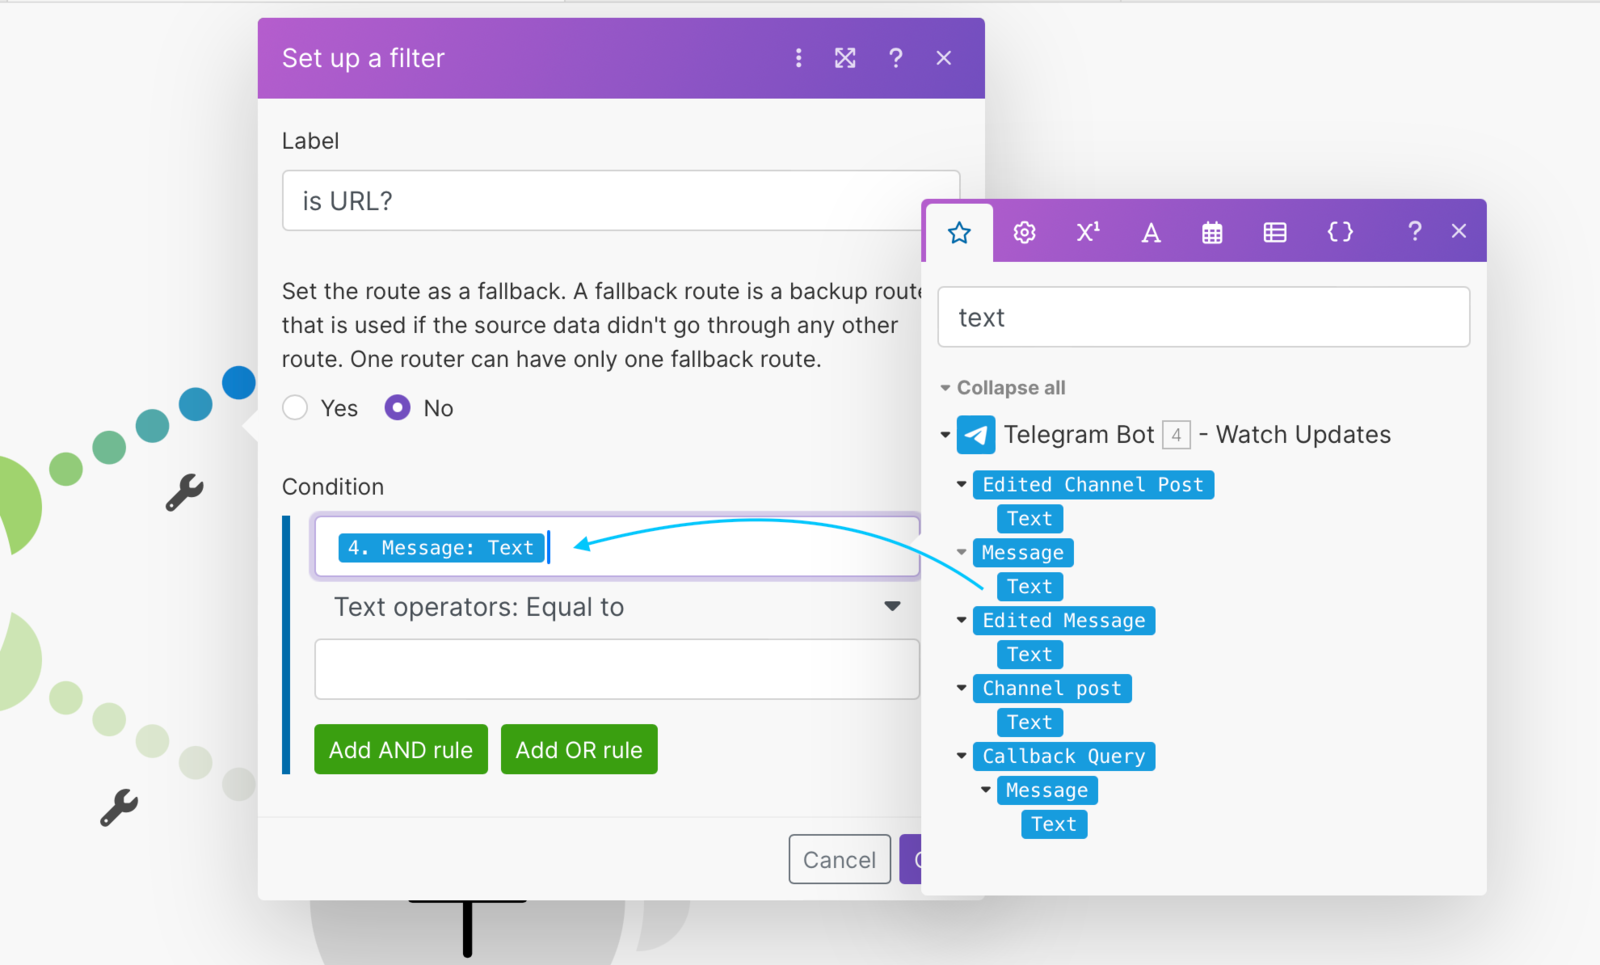
In the "Operators" field, select "Matches pattern" and input the following regular expression: http[s]?://(?:[a-zA-Z]|[0-9]|[$-_@.&+]|[!*\\(\\),]|(?:%[0-9a-fA-F][0-9a-fA-F]))+
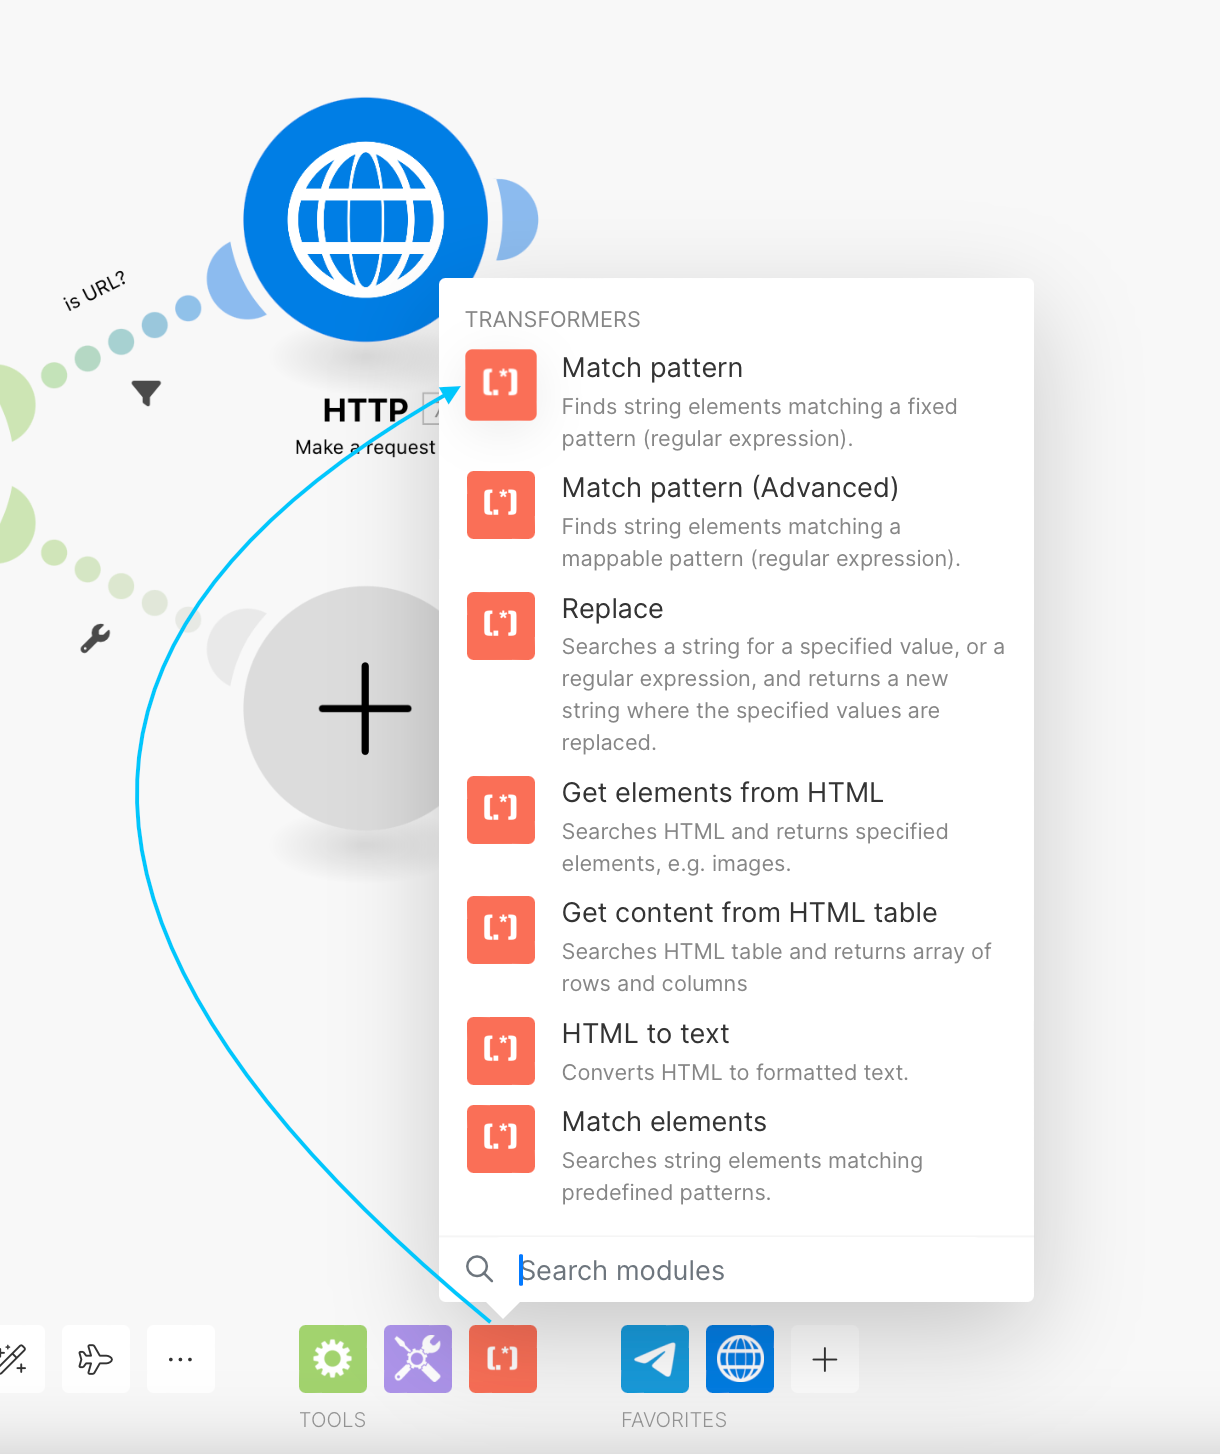
5. Extracting the Title
Next, we need to extract the title. To do this, add a Text parser module by selecting it from the bottom panel, and choose "Match Pattern" from the list.
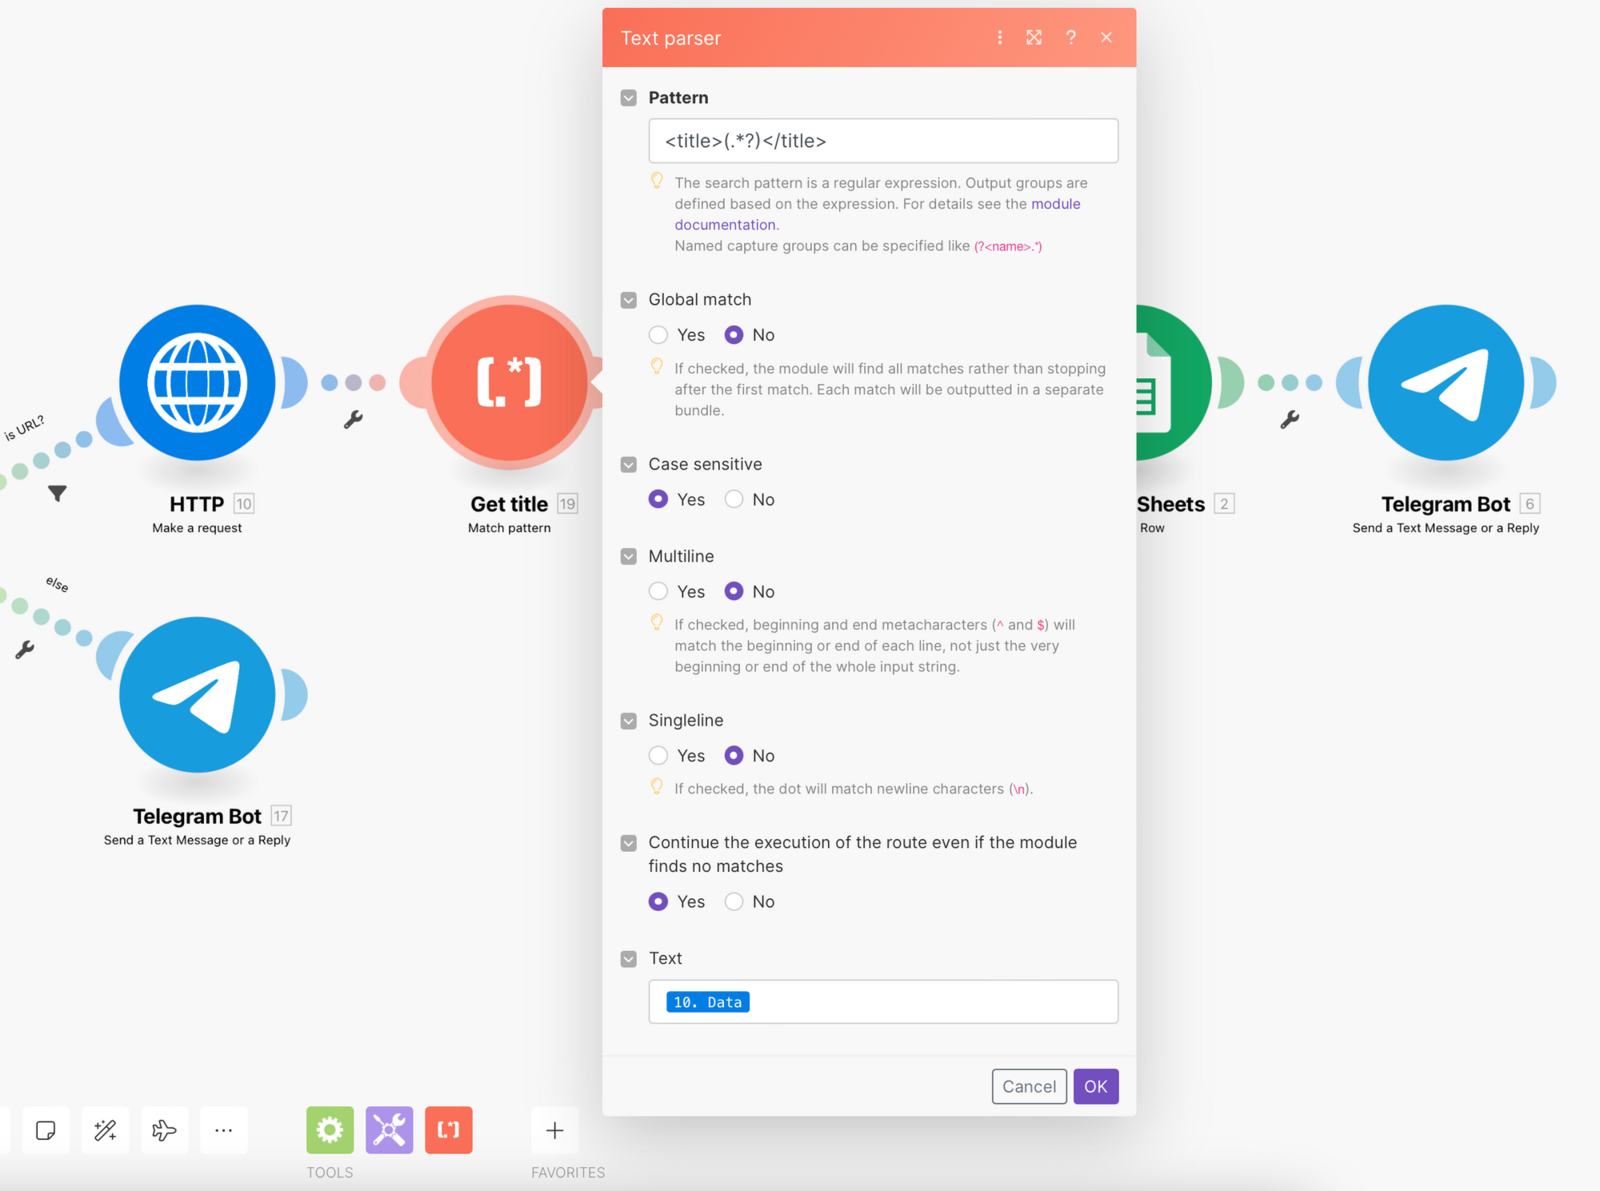
6. Configure the Text Parser:
- Pattern:
<title>(.*?)</title> - Leave the other settings as default, except for "Continue the execution of the route even if the module finds no matches," which should be set to "Yes."
- In the "Text" field, add "Data" and click OK.
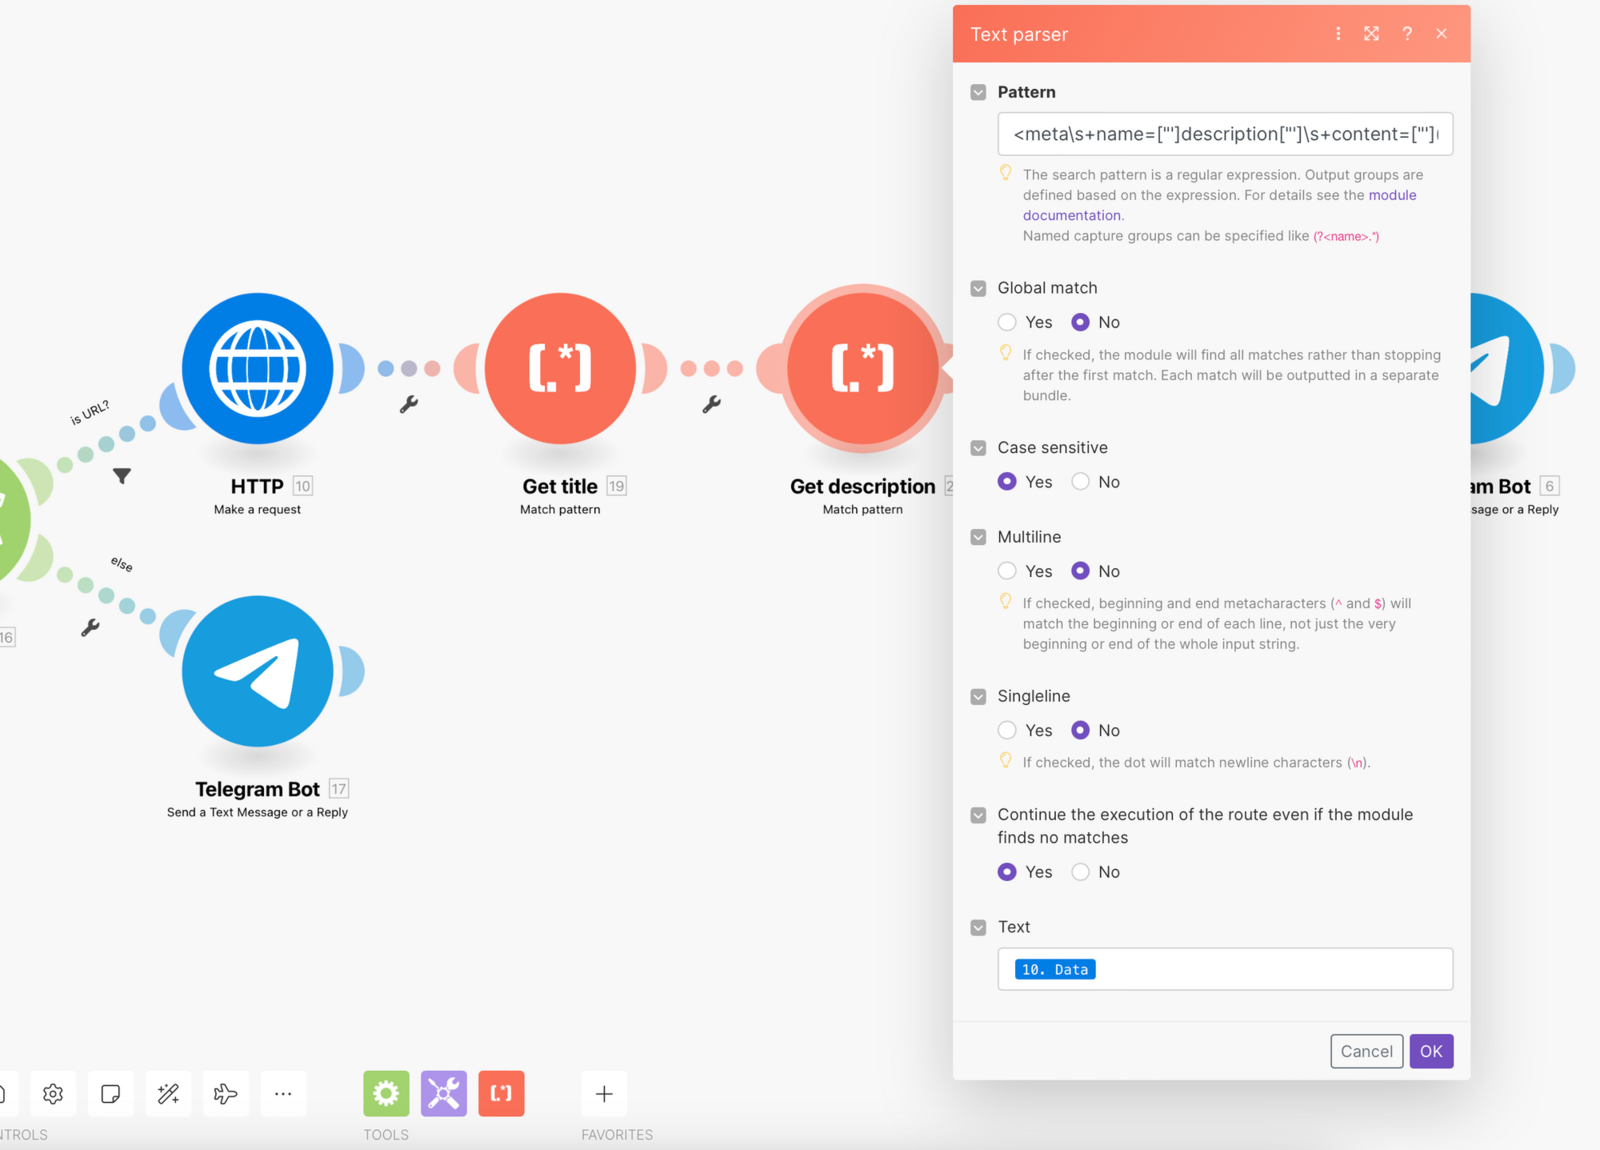
7. Extracting the Description
For extracting the description, add another Text parser module and select "Match Pattern":
- Pattern:
<meta\s+name=["']description["']\s+content=["'](.*?)["'] - For the setting "Continue the execution of the route even if the module finds no matches," choose "Yes."
- In the "Text" field, add "Data."
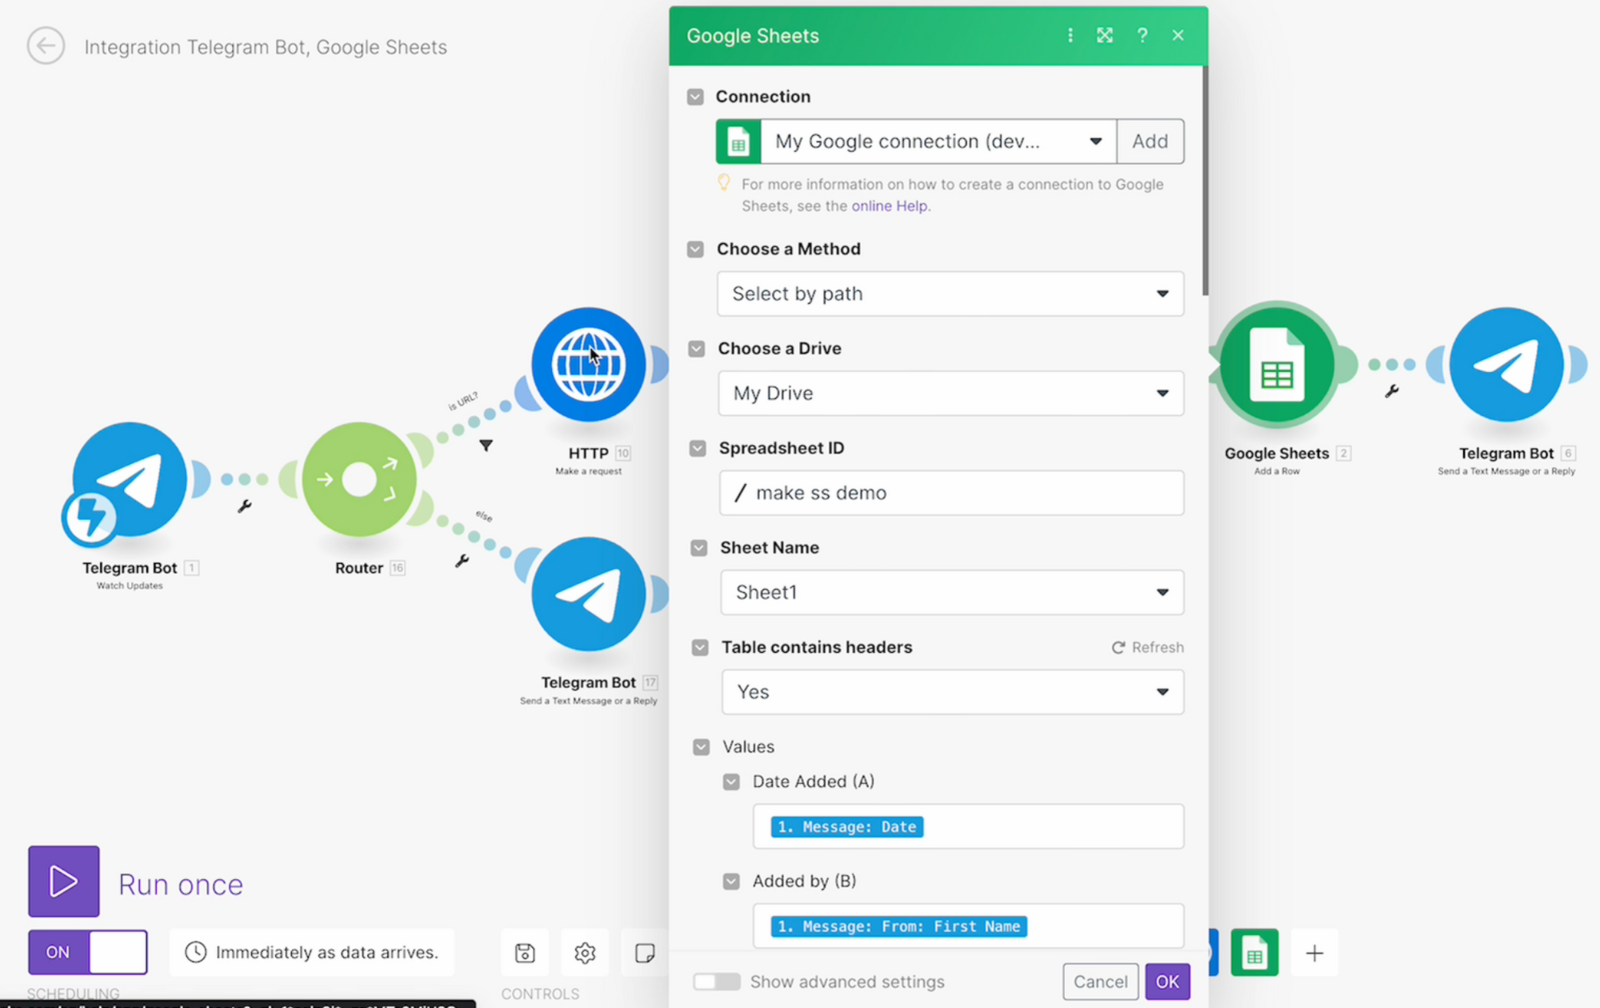
8. Google Sheets Integration
In this step, add a Google Sheets module to insert a new row with the extracted data. Detailed guidance on integrating with Google Sheets is available in the online Help
By the way, SpreadSimple offers an affiliate template that includes a catalog table with a formula to add your referral code to the links automatically.

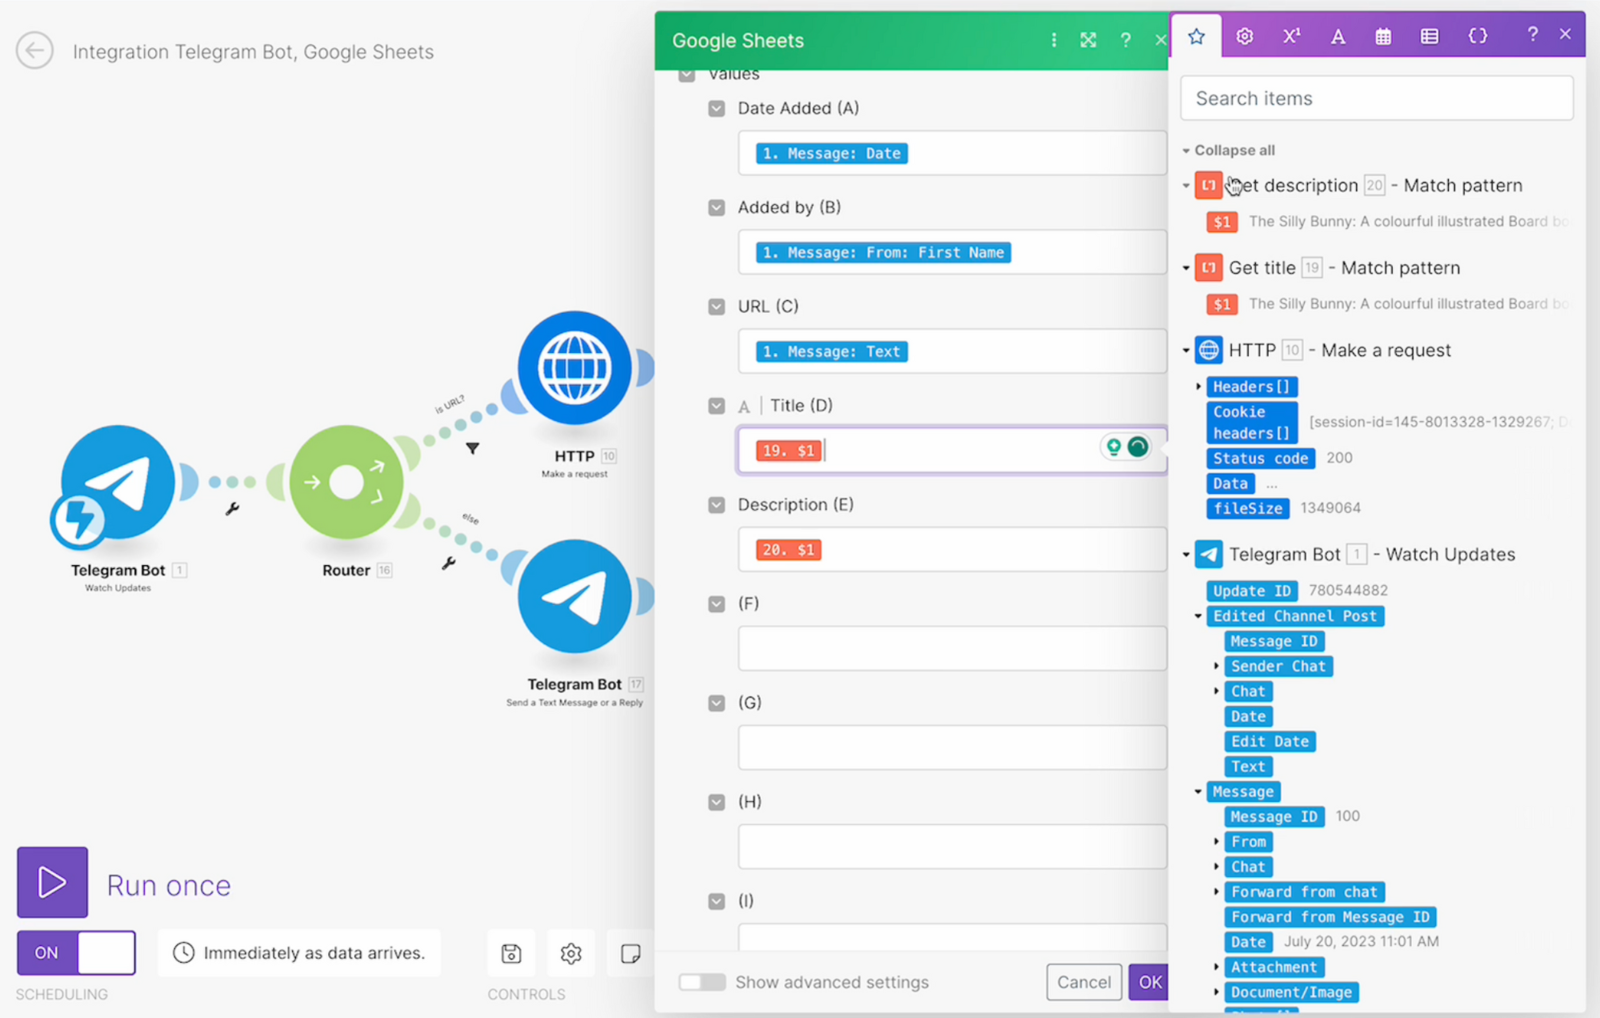
9. Specifying Columns in Google Sheets
You can specify which data goes into which column. We recommend adding some technical columns for additional information, such as the entry date and the sender's name. These can be helpful for tracking the source of each entry. The "Message: Text" parameter will insert the URL you send to the bot, while the title and description correspond to the name and description.
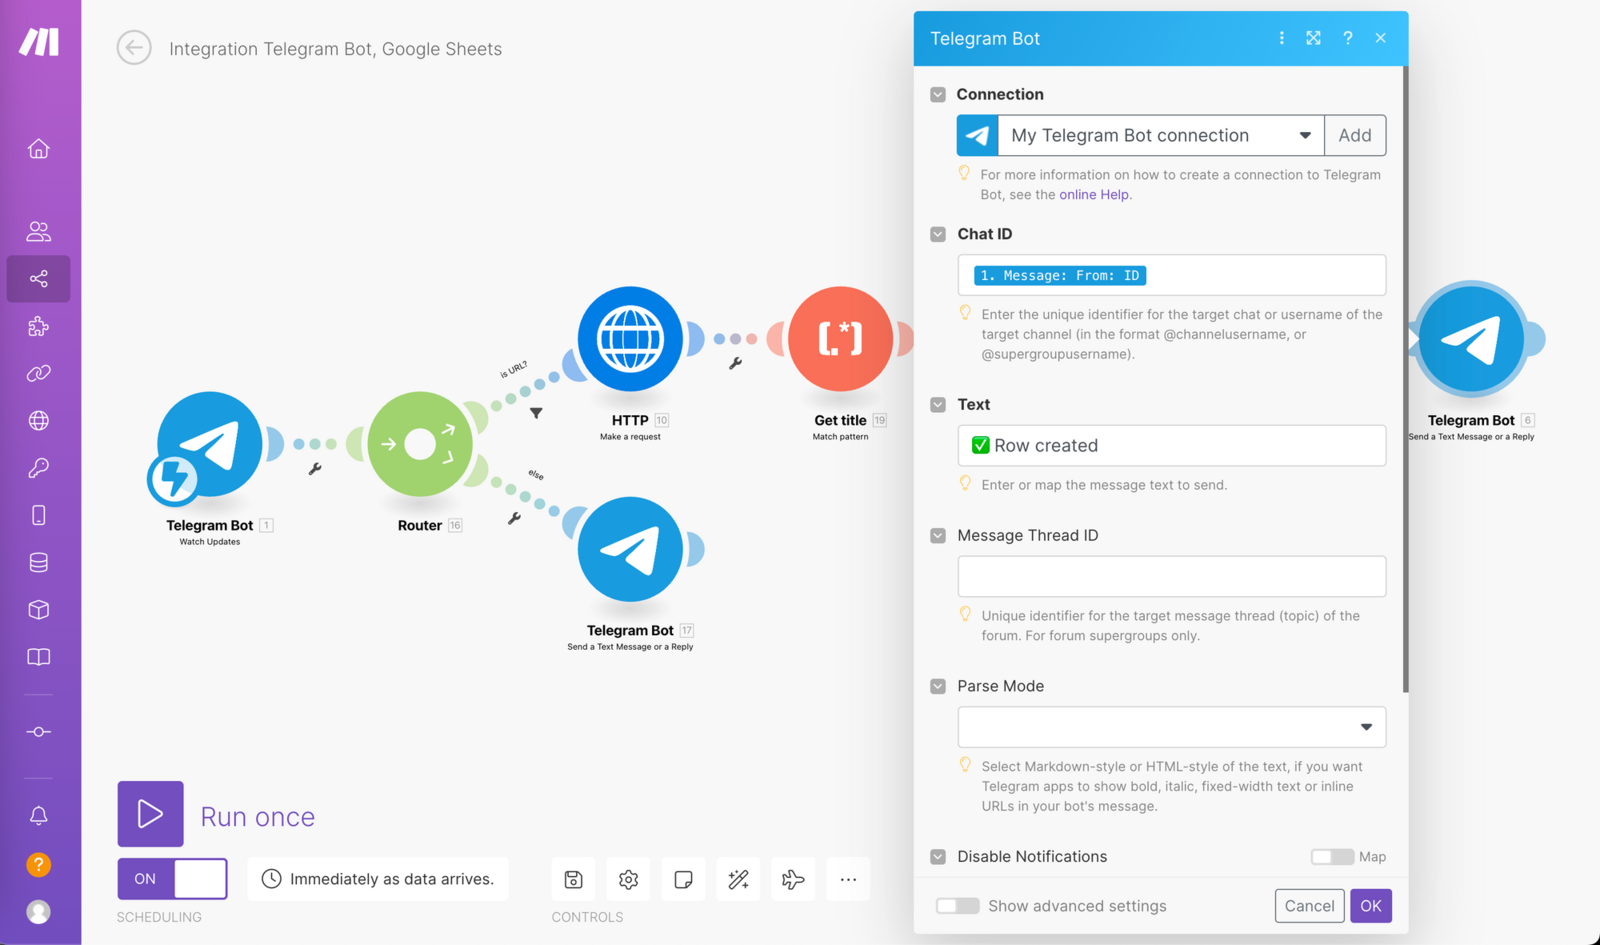
10. Sending a Response to the Telegram Bot
In this step, configure a response in the bot to confirm that the row has been added. Add another Telegram Bot module and choose "Send a Text Message or a Reply." Fill in the following fields: Chat ID - Message: From: ID, and in the "Text" field, enter the message that the bot will send you. In our case, it's "Raw created."
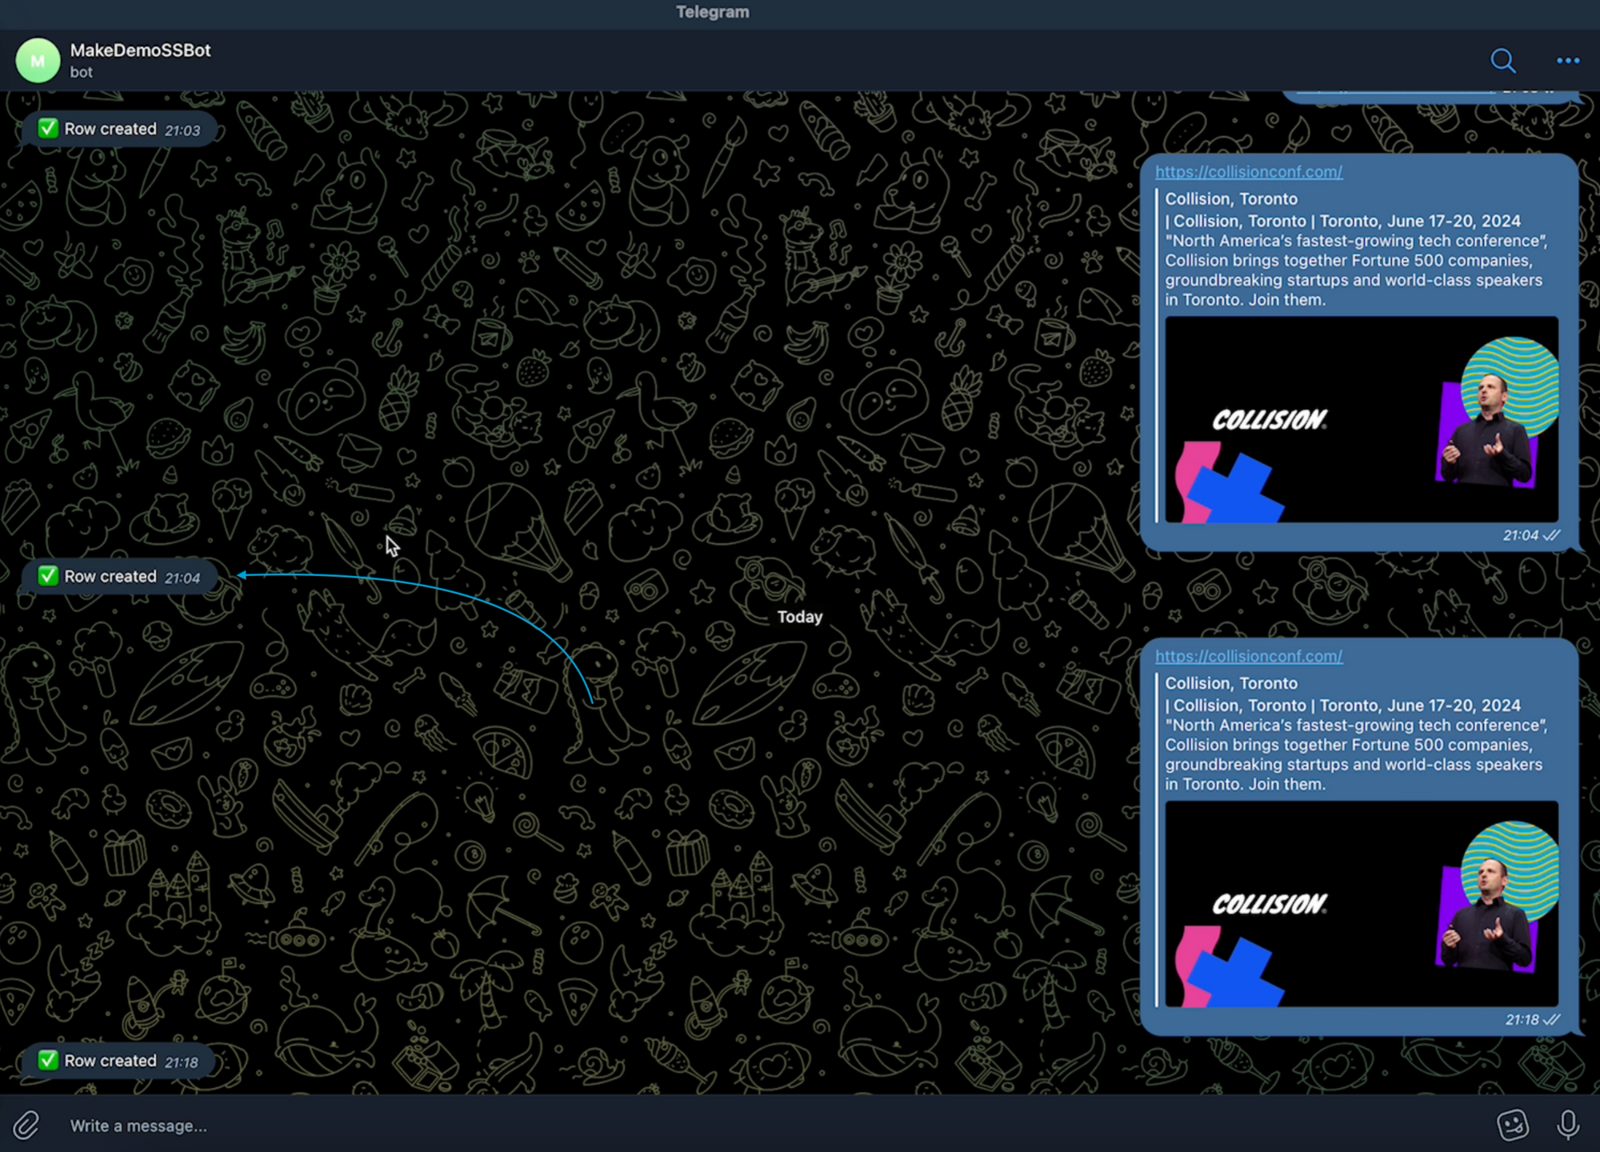
Here's how it looks on Telegram
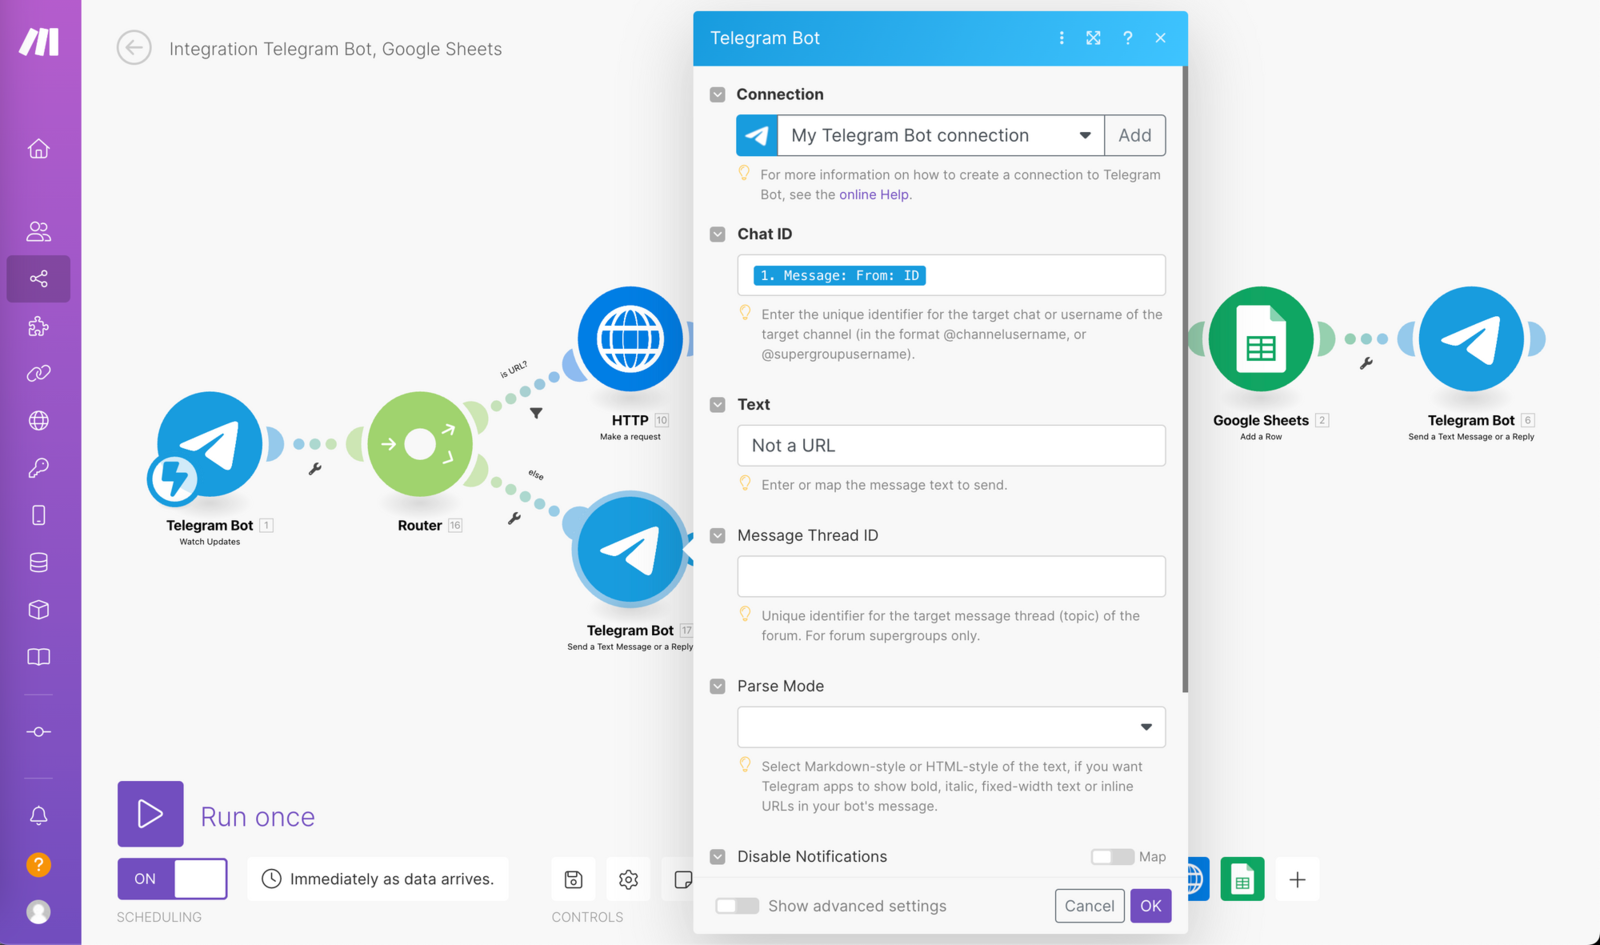
11. Handling Non-URL Messages
We've set up a successful scenario in which the bot receives a URL in the message. Now, let's add a message to the Telegram bot if the message doesn't contain a URL. Add another Telegram module and fill in the fields as in the previous step. In the "Text" field, write "Not a URL".
Now, the router will automatically check and select one of the scenarios based on whether your message contains a URL or not. You're all set to use it!
And here's a video demonstrating how it works:
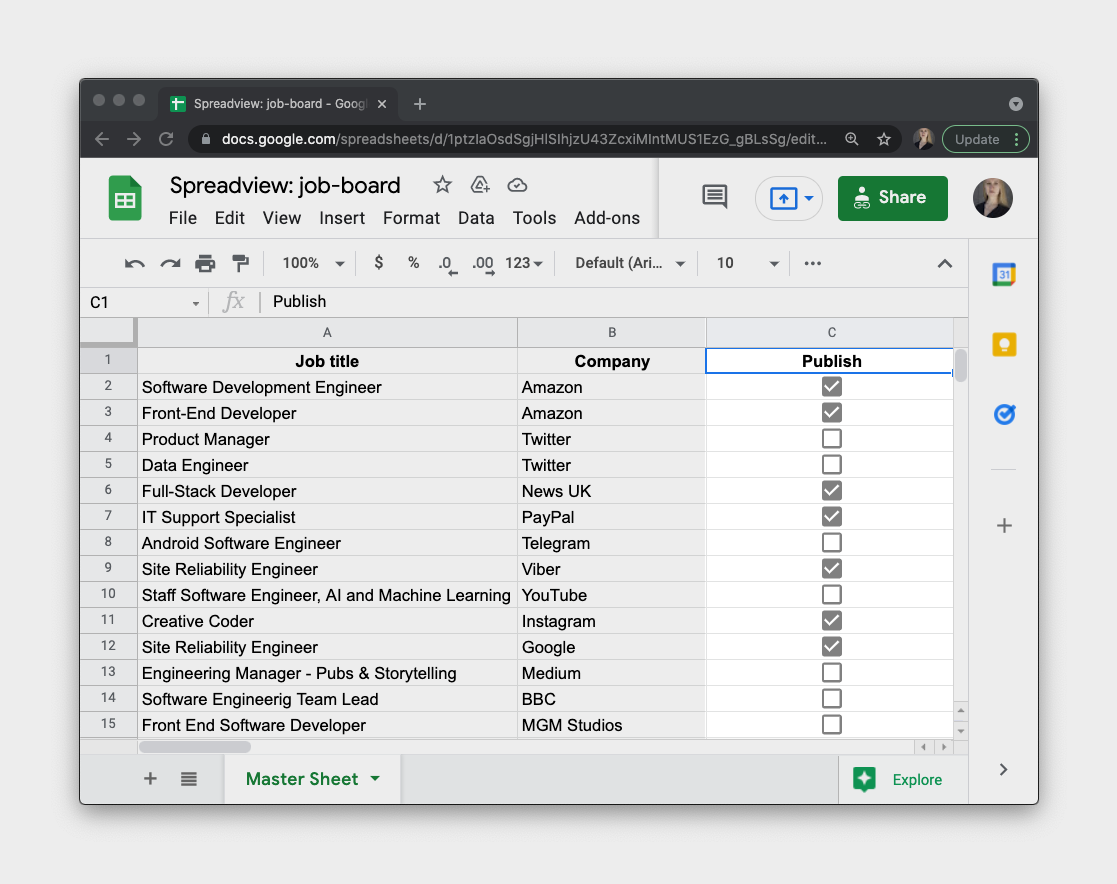
Great news! We've made it super easy to automatically add content to your Google Sheet. To make sure everything is correct and to add more content, you can use an approval system with checkboxes. With this, a row will only show up on your website after you've given it the thumbs up. You can learn exactly how to set this up in our article: "How to Add Checkboxes in Google Sheets".
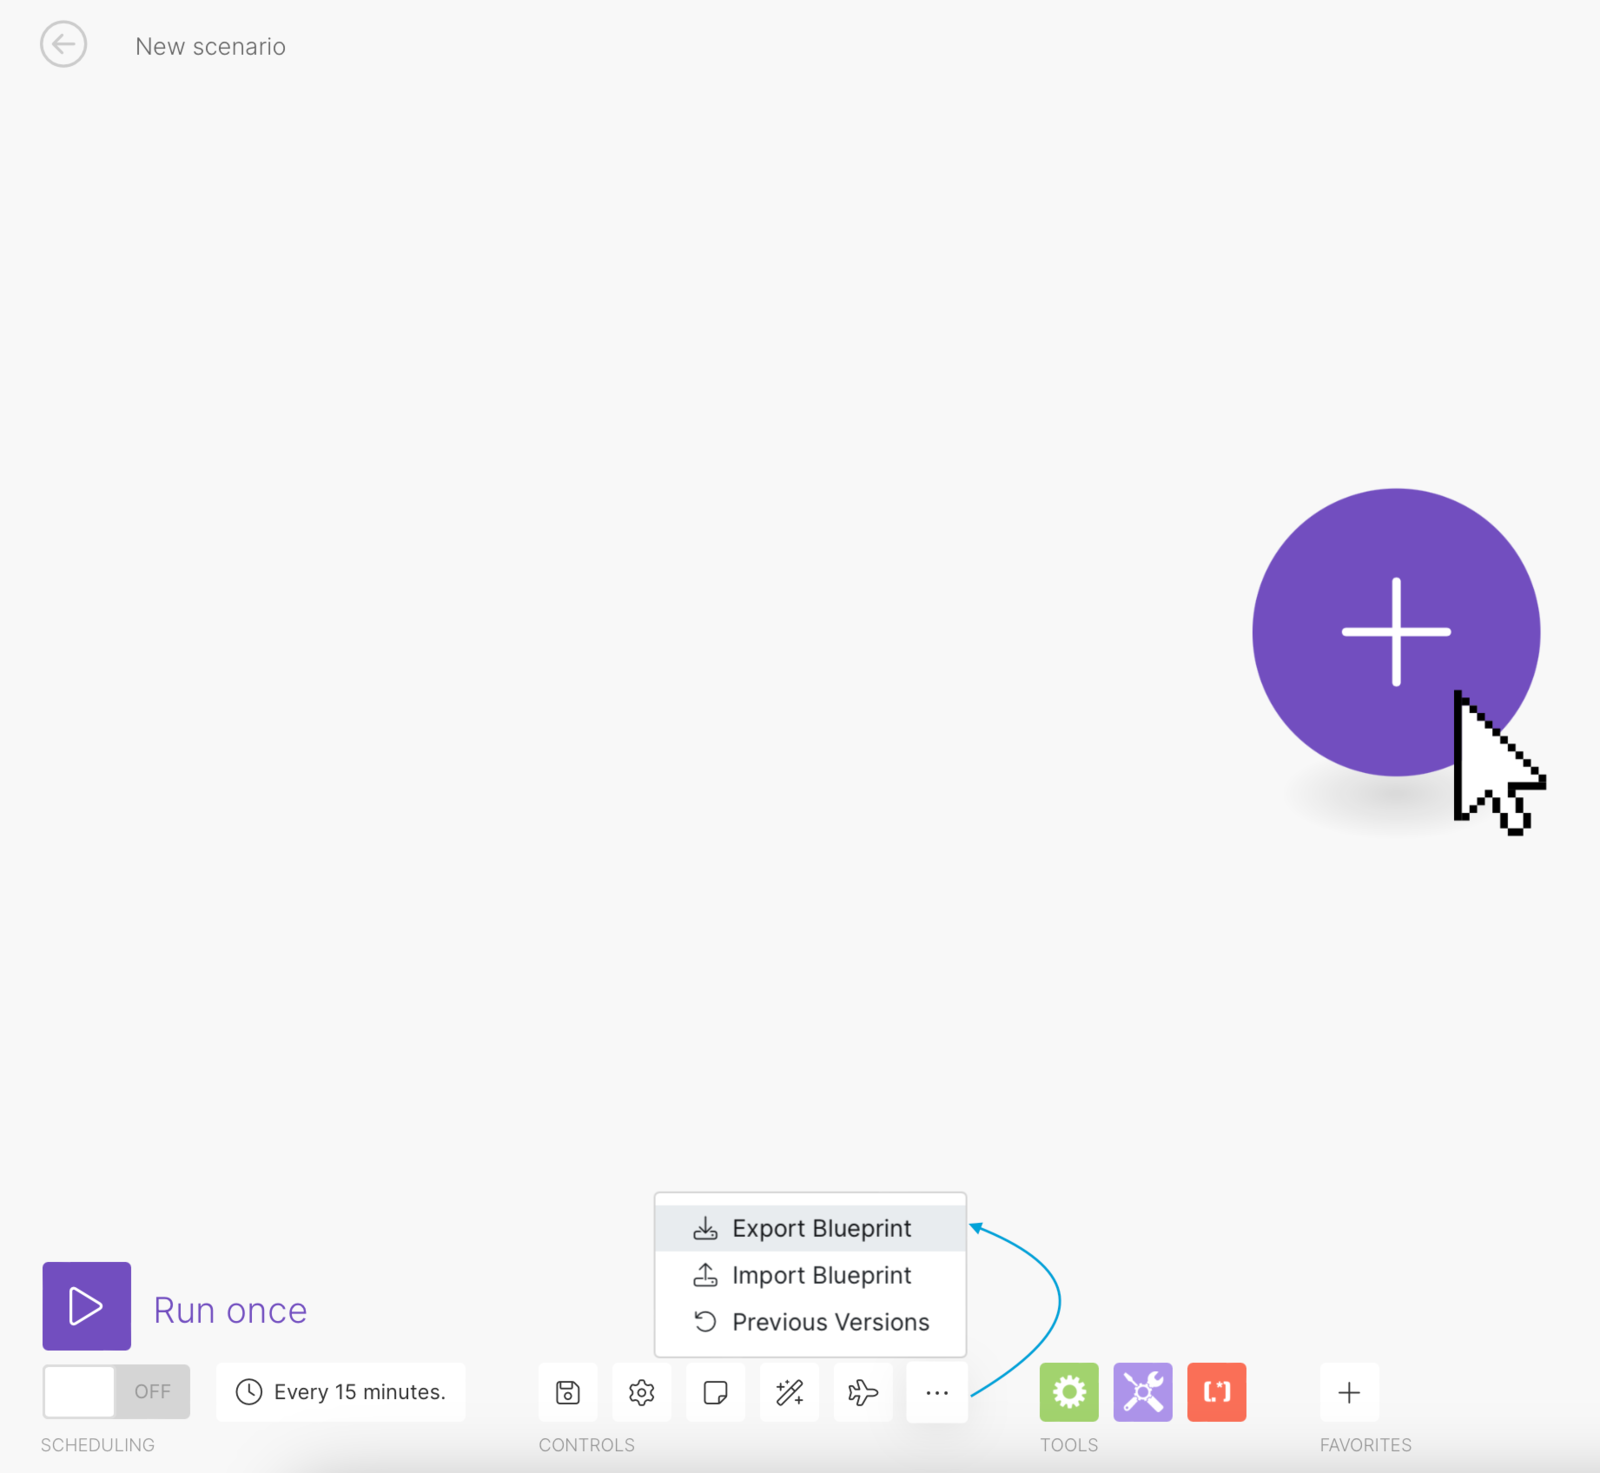
Import this automation template for a quick start
While we've worked hard to provide you with this comprehensive guide for automating and simplifying your work processes, we've taken it a step further. We've created a file for you - "blueprint.json" - which can be effortlessly imported into Make.com. All that remains is to input your Telegram bot credentials, link the Google Sheet, and specify the columns for data recording. Download it and experience an even smoother automation process!
Benefits of automation
In summary, our automation solution makes adding data to Google Sheets a breeze, just a couple of clicks and you're done! Plus, no more tedious copy-pasting, which saves you a ton of time and effort. It's designed with affiliate marketers in mind to make your work more efficient and productive.