
TL;DR: SpreadSimple Range Filters let visitors narrow listings by numeric values such as price, distance, or another measurable attribute. Configure them by preparing the relevant Google Sheets data and formula. This small interaction can materially improve catalog usability and product discovery.
Crafting seamless navigation for your website listings is crucial for boosting your business. While filters and sorting might seem like tiny insignificant technical details, they help customers discover precisely what they seek.
One of the ways to streamline sorting is by integrating range filters onto your website. These filters empower customers to narrow down options based on specific price ranges, production dates, or other parameters.
The good news is with SpreadSimple, setting up these filters is a breeze. In just under 10 minutes, you can have them up and running directly from your Google Sheet.
Adding range filters to any SpreadSimple website
1. Create a website, if you don’t have one yet. You can use any of the SpreadSimple’s templates or build it from scratch.
2. Fill the website with content. Set up the appearance of the Main and Details pages, and then go to the linked Google Sheets document to add your items or products to the website.
3. In the spreadsheet, add a new column for the range filter. To create the filter, use the IFS function. It that evaluates multiple conditions and returns a value that corresponds to the first true condition. To use the function, you need to have a column of number values to connect it to — for instance, the price or car mileage.
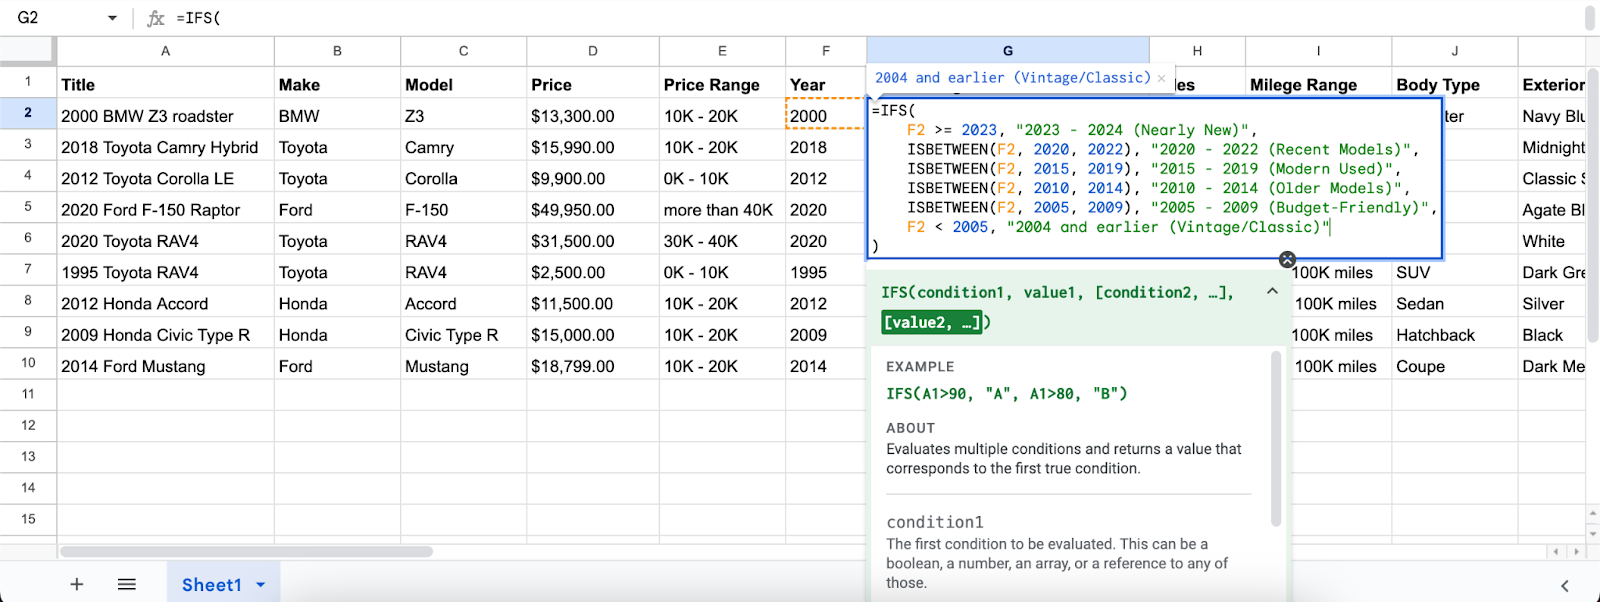
Now, to create the filter, input the function:
=IFS(CELLNUMBER >= ENDVALUE, "RANGENAME", ISBETWEEN(CELLNUMBER, ENDVALUE, ENDVALUE), "RANGENAME", ISBETWEEN(CELLNUMBER, ENDVALUE, ENDVALUE), "RANGENAME", CELLNUMER < ENDVALUE, "RANGENAME")
In this formula:
- CELLNUMBER is the number value that will set the condition and define the range of the specific product.
- ENDVALUE are the border values for each range. For instance if you want to create a price range from $10000 to 30000, you write down these values.
- RANGENAME is the title of each range that you want to display on the website. For the example above, it could be “10K—30K”. Note that it’s better not to use commas to format numbers — otherwise, Google Sheets will recognize them as different values.
Here’s how a finished IFS function can look in the document:
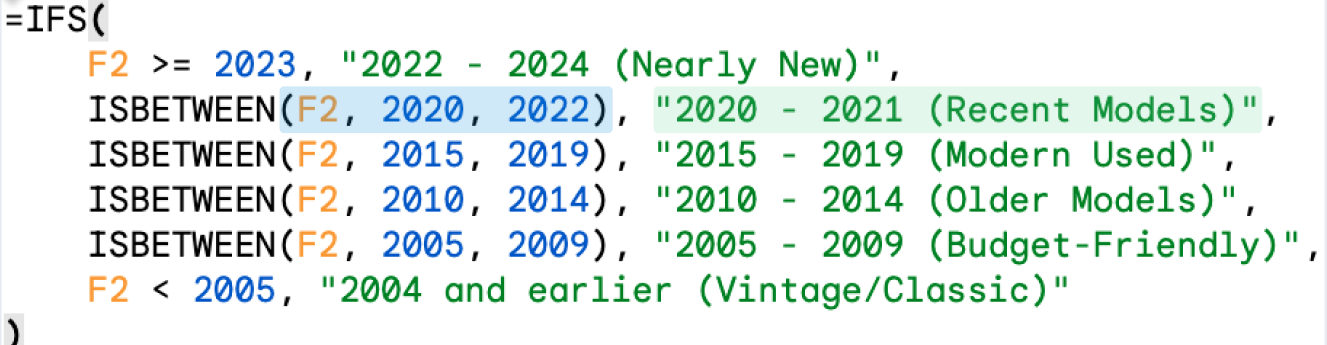
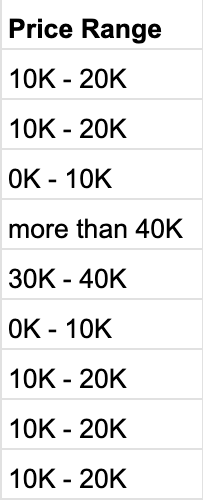
When you finish editing the cell and click outside of it, you should see only the name of your range.
Stretch the function for all your items and see if it works correctly.
4. Activate the filter on the website. Go back to the website editor and hit the Refrech button.
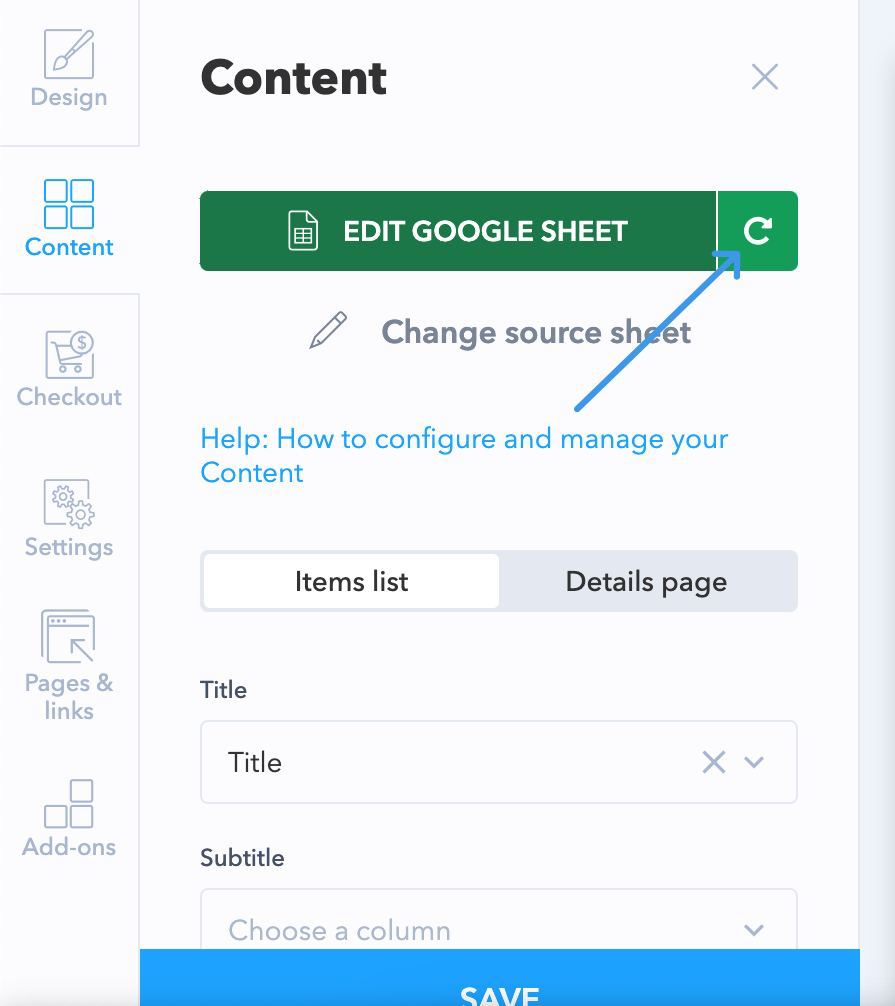
After that, in same Content tab find the Filter menu, open the drop-down menu, and select your newly created column.
Once you do this, you can save the changes and go test the new filter on the website.
Adding range filters with the Car Dealer Template
1. Create a website using SpreadSimple. To start fast, use one of the templates from SpreadSimple’s list.
One of the new templates that has the range filters feature already pre-built is the Car Dealer Website template.
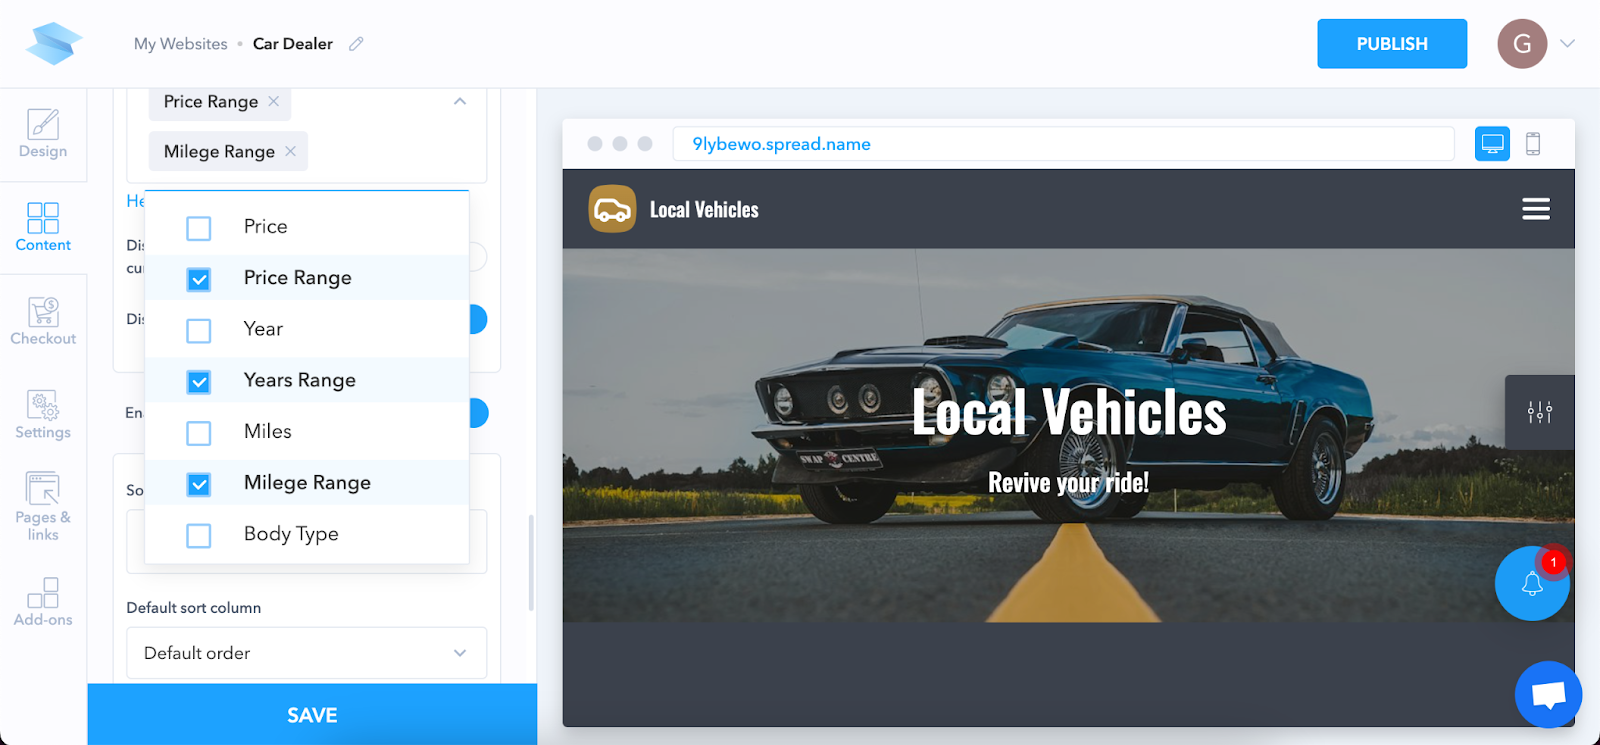
2. In the workspace, go to the Content tab and find Filters. Check Enable filters and pick the ones you want to show on your website from the drop-down list. There are pre-built options for price, year, and mileage ranges.
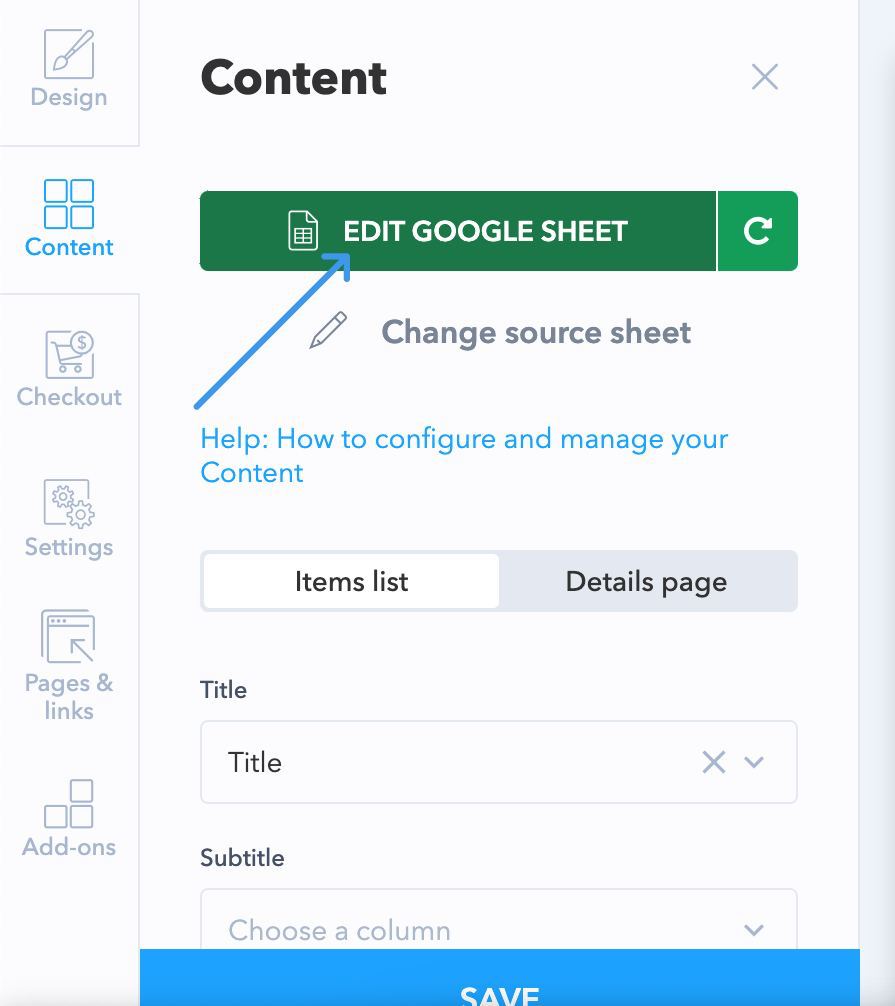
3. Go to the Google sheet connected to your website. For that, hit the Edit Google Sheet button at the top of the Content tab.
Double-click on any cell in a range filter column to set up the sorting rule. The filter uses the IFS function of Google Sheets. This function ensures that each listing falls under the right range, based on its year of issue, price, or mileage.
Define your own data ranges and give them custom names. To do this, adjust the values within the brackets to specify the range, and then give it a title by editing the text enclosed in quotes.
If needed, you can add more rows in the formula to create more ranges.
4. Repeat with the rest of the range filters. Note that it’s better not to use commas to format numbers — otherwise, Google Sheets will recognize them as different values. Instead, you can write big numbers like so:
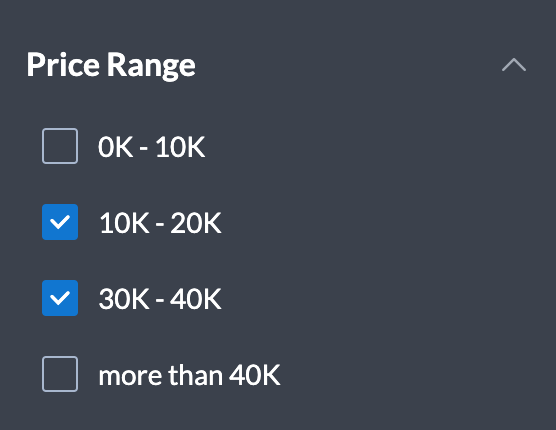
5. Publish the website and check how it looks. After you’re done setting up your website, publish it, and see how it works. Here’s how the price range will look:
Conclusion on the range filters with SpreadSimple
Sorting and filtering options are small details on your website that make a lot of difference when it comes to the usability of your website and, essentially, business growth. With SpreadSimple, you can set up range filters in no time by just editing a simple formula in Google Sheets.